Automation
Tutorial: skincare flow
Build a complete skincare sales flow, step by step with screenshots.
What we are building
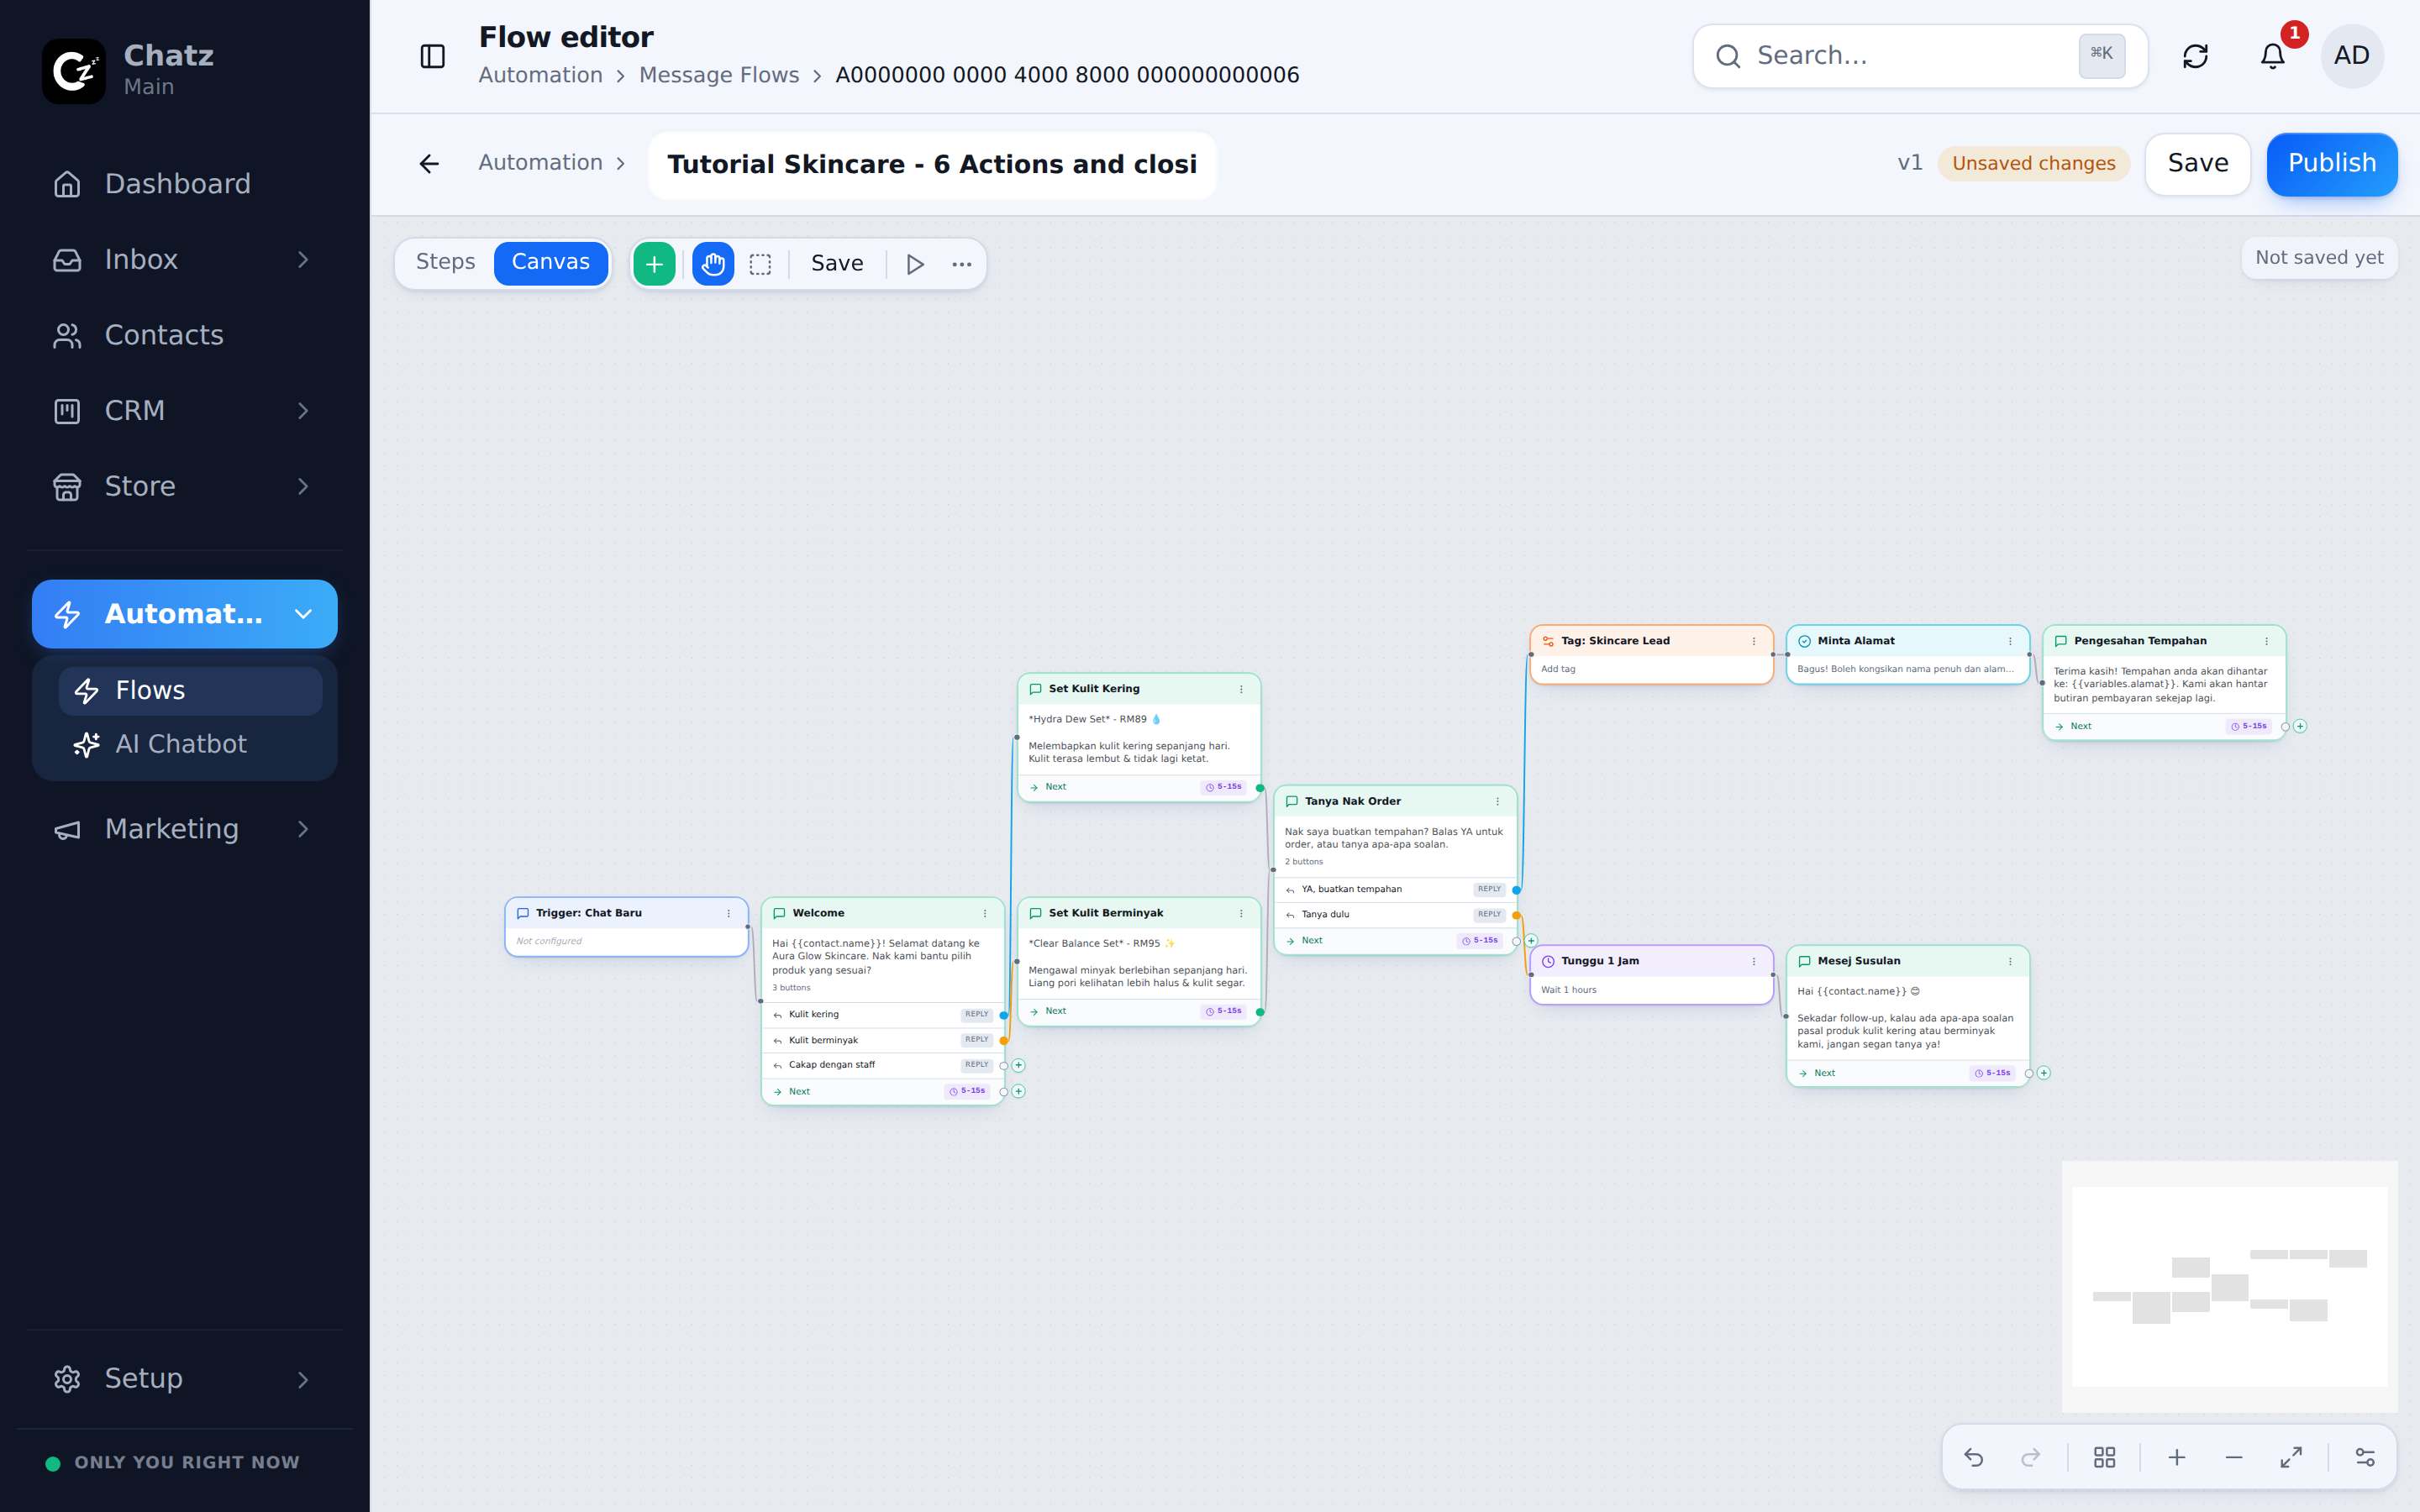
This tutorial builds one complete sales flow for an imaginary skincare brand, Aura Glow Skincare, from an empty canvas to a published flow. When a new customer messages the brand for the first time, the flow greets them, asks about their skin type with a button menu, recommends the right product set, takes the order and delivery address, tags the hot leads, follows up with anyone who hesitated, and hands the "let me talk to a person" cases to your team, with an out-of-hours reply when nobody is in. Along the way it uses every core step type: Send message, Action, Wait for input, Delay and Condition.
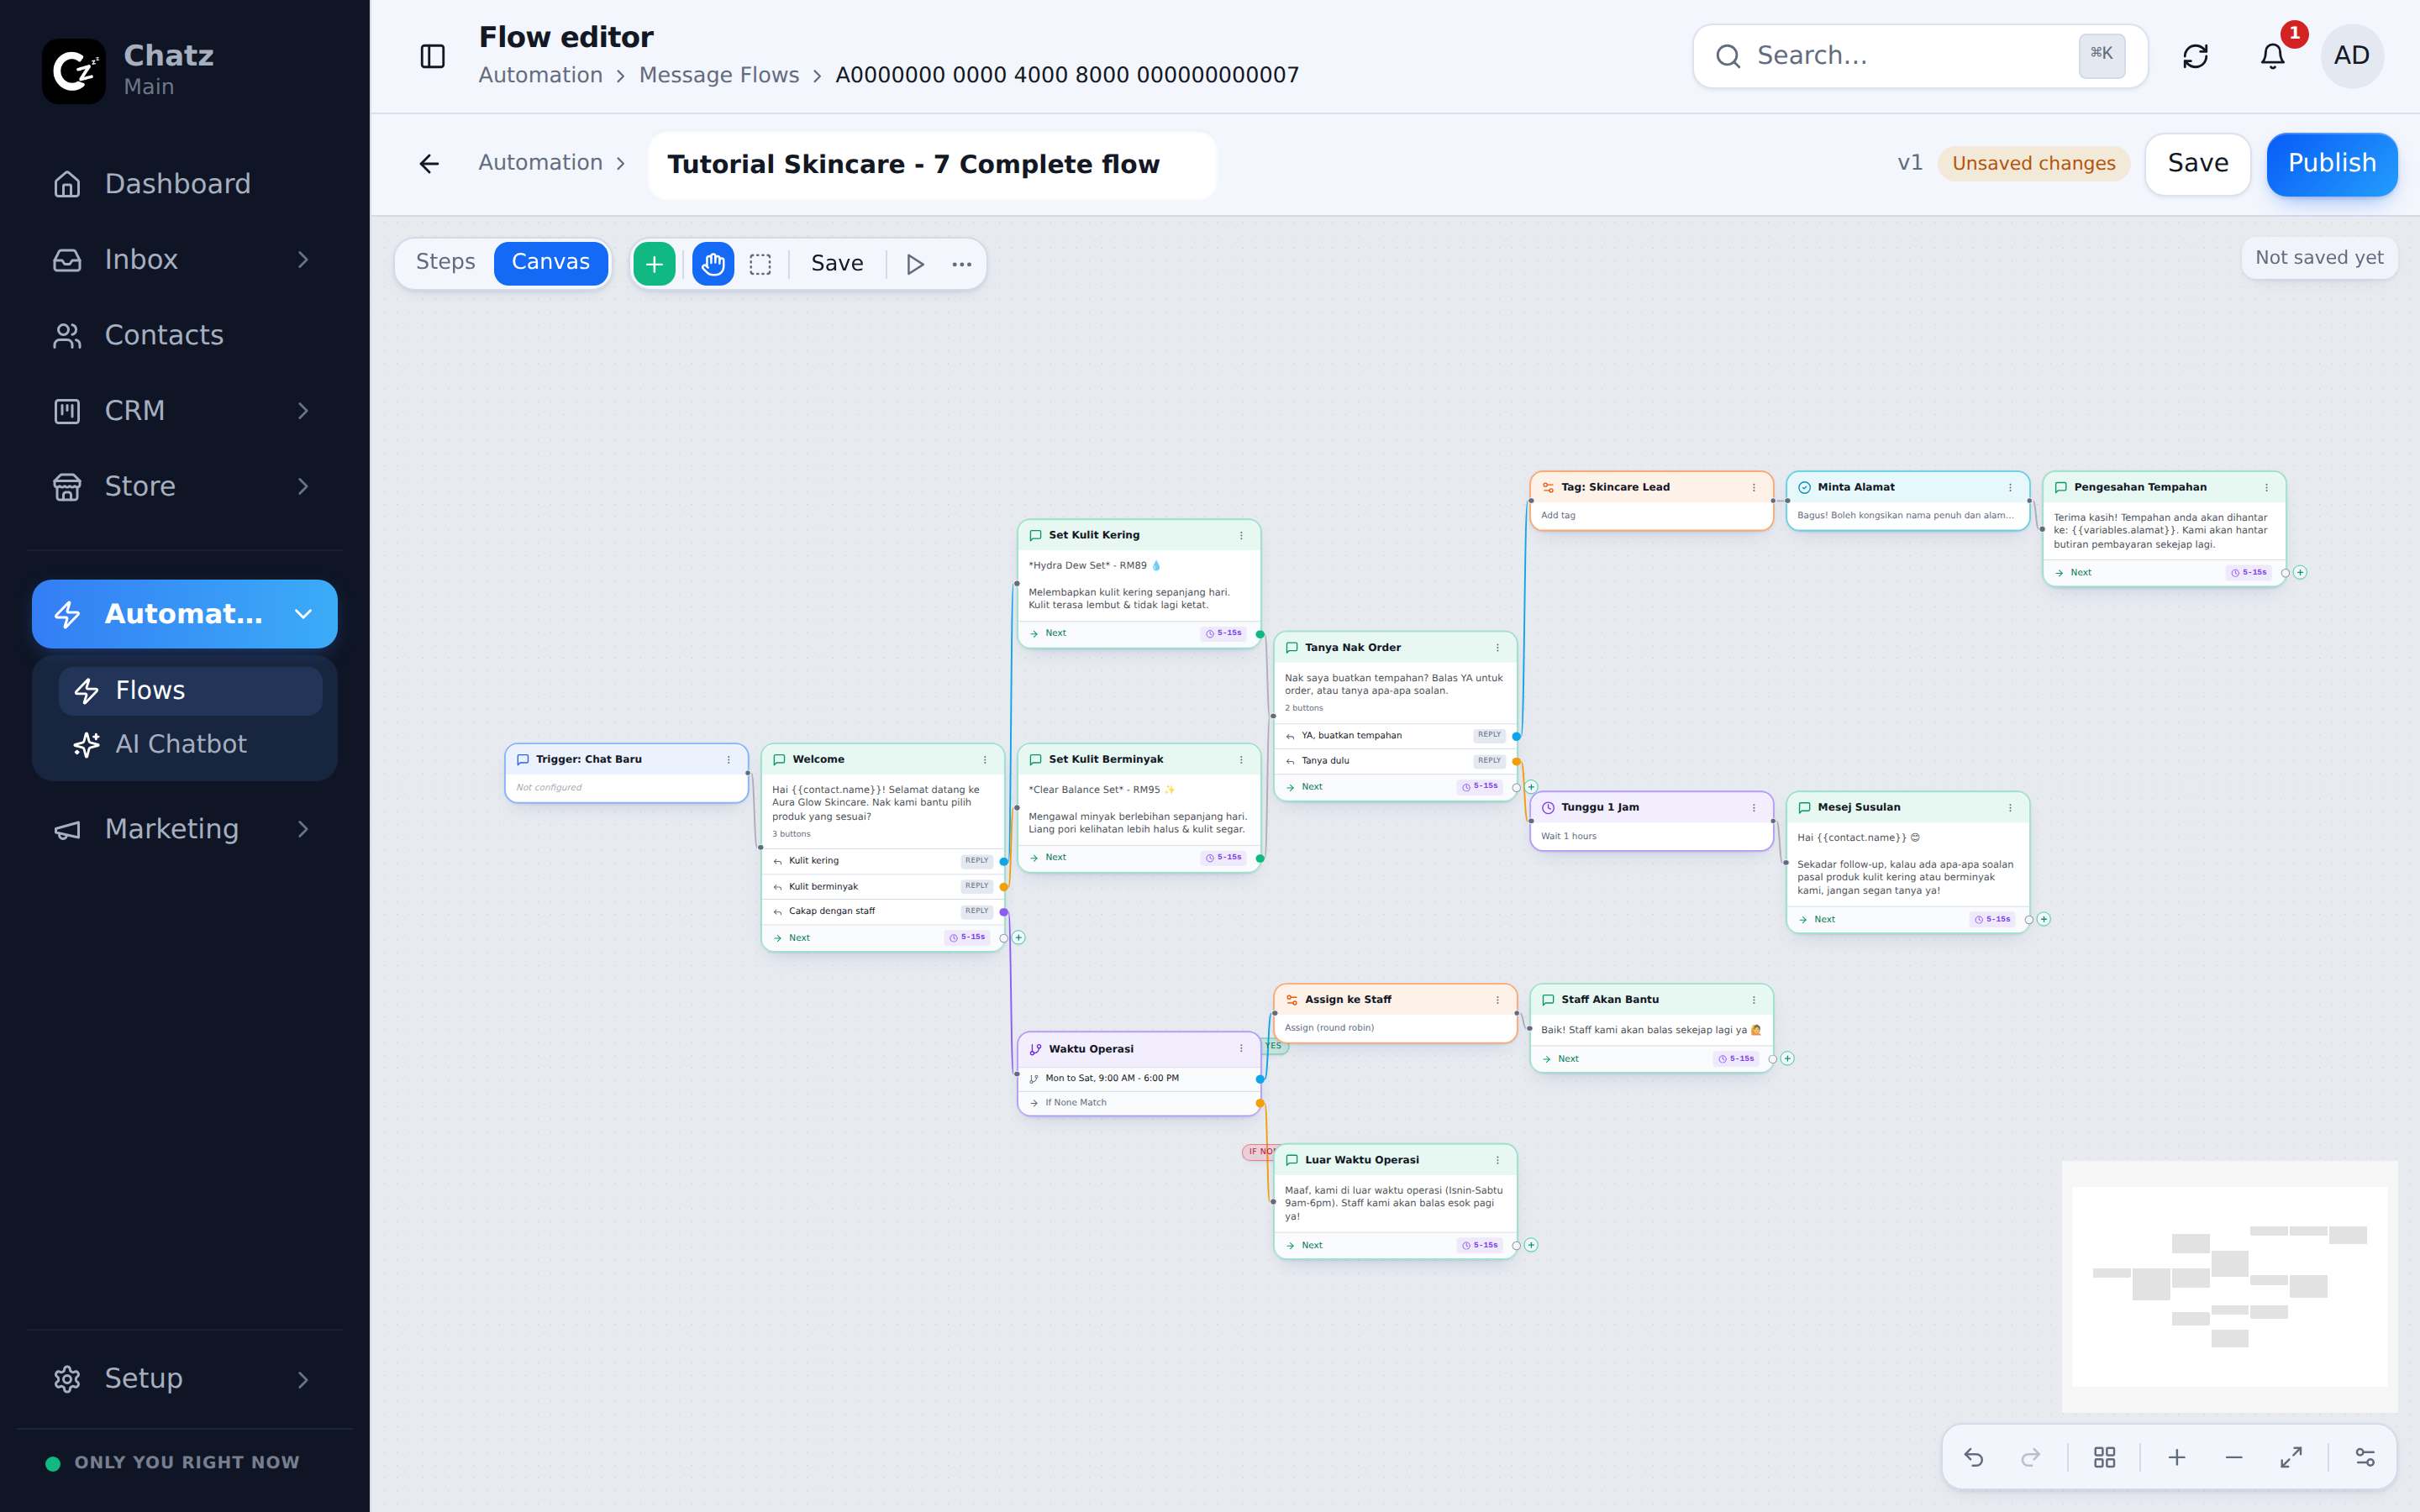
The conversation we are aiming for looks like this:
- Customer messages the brand for the first time.
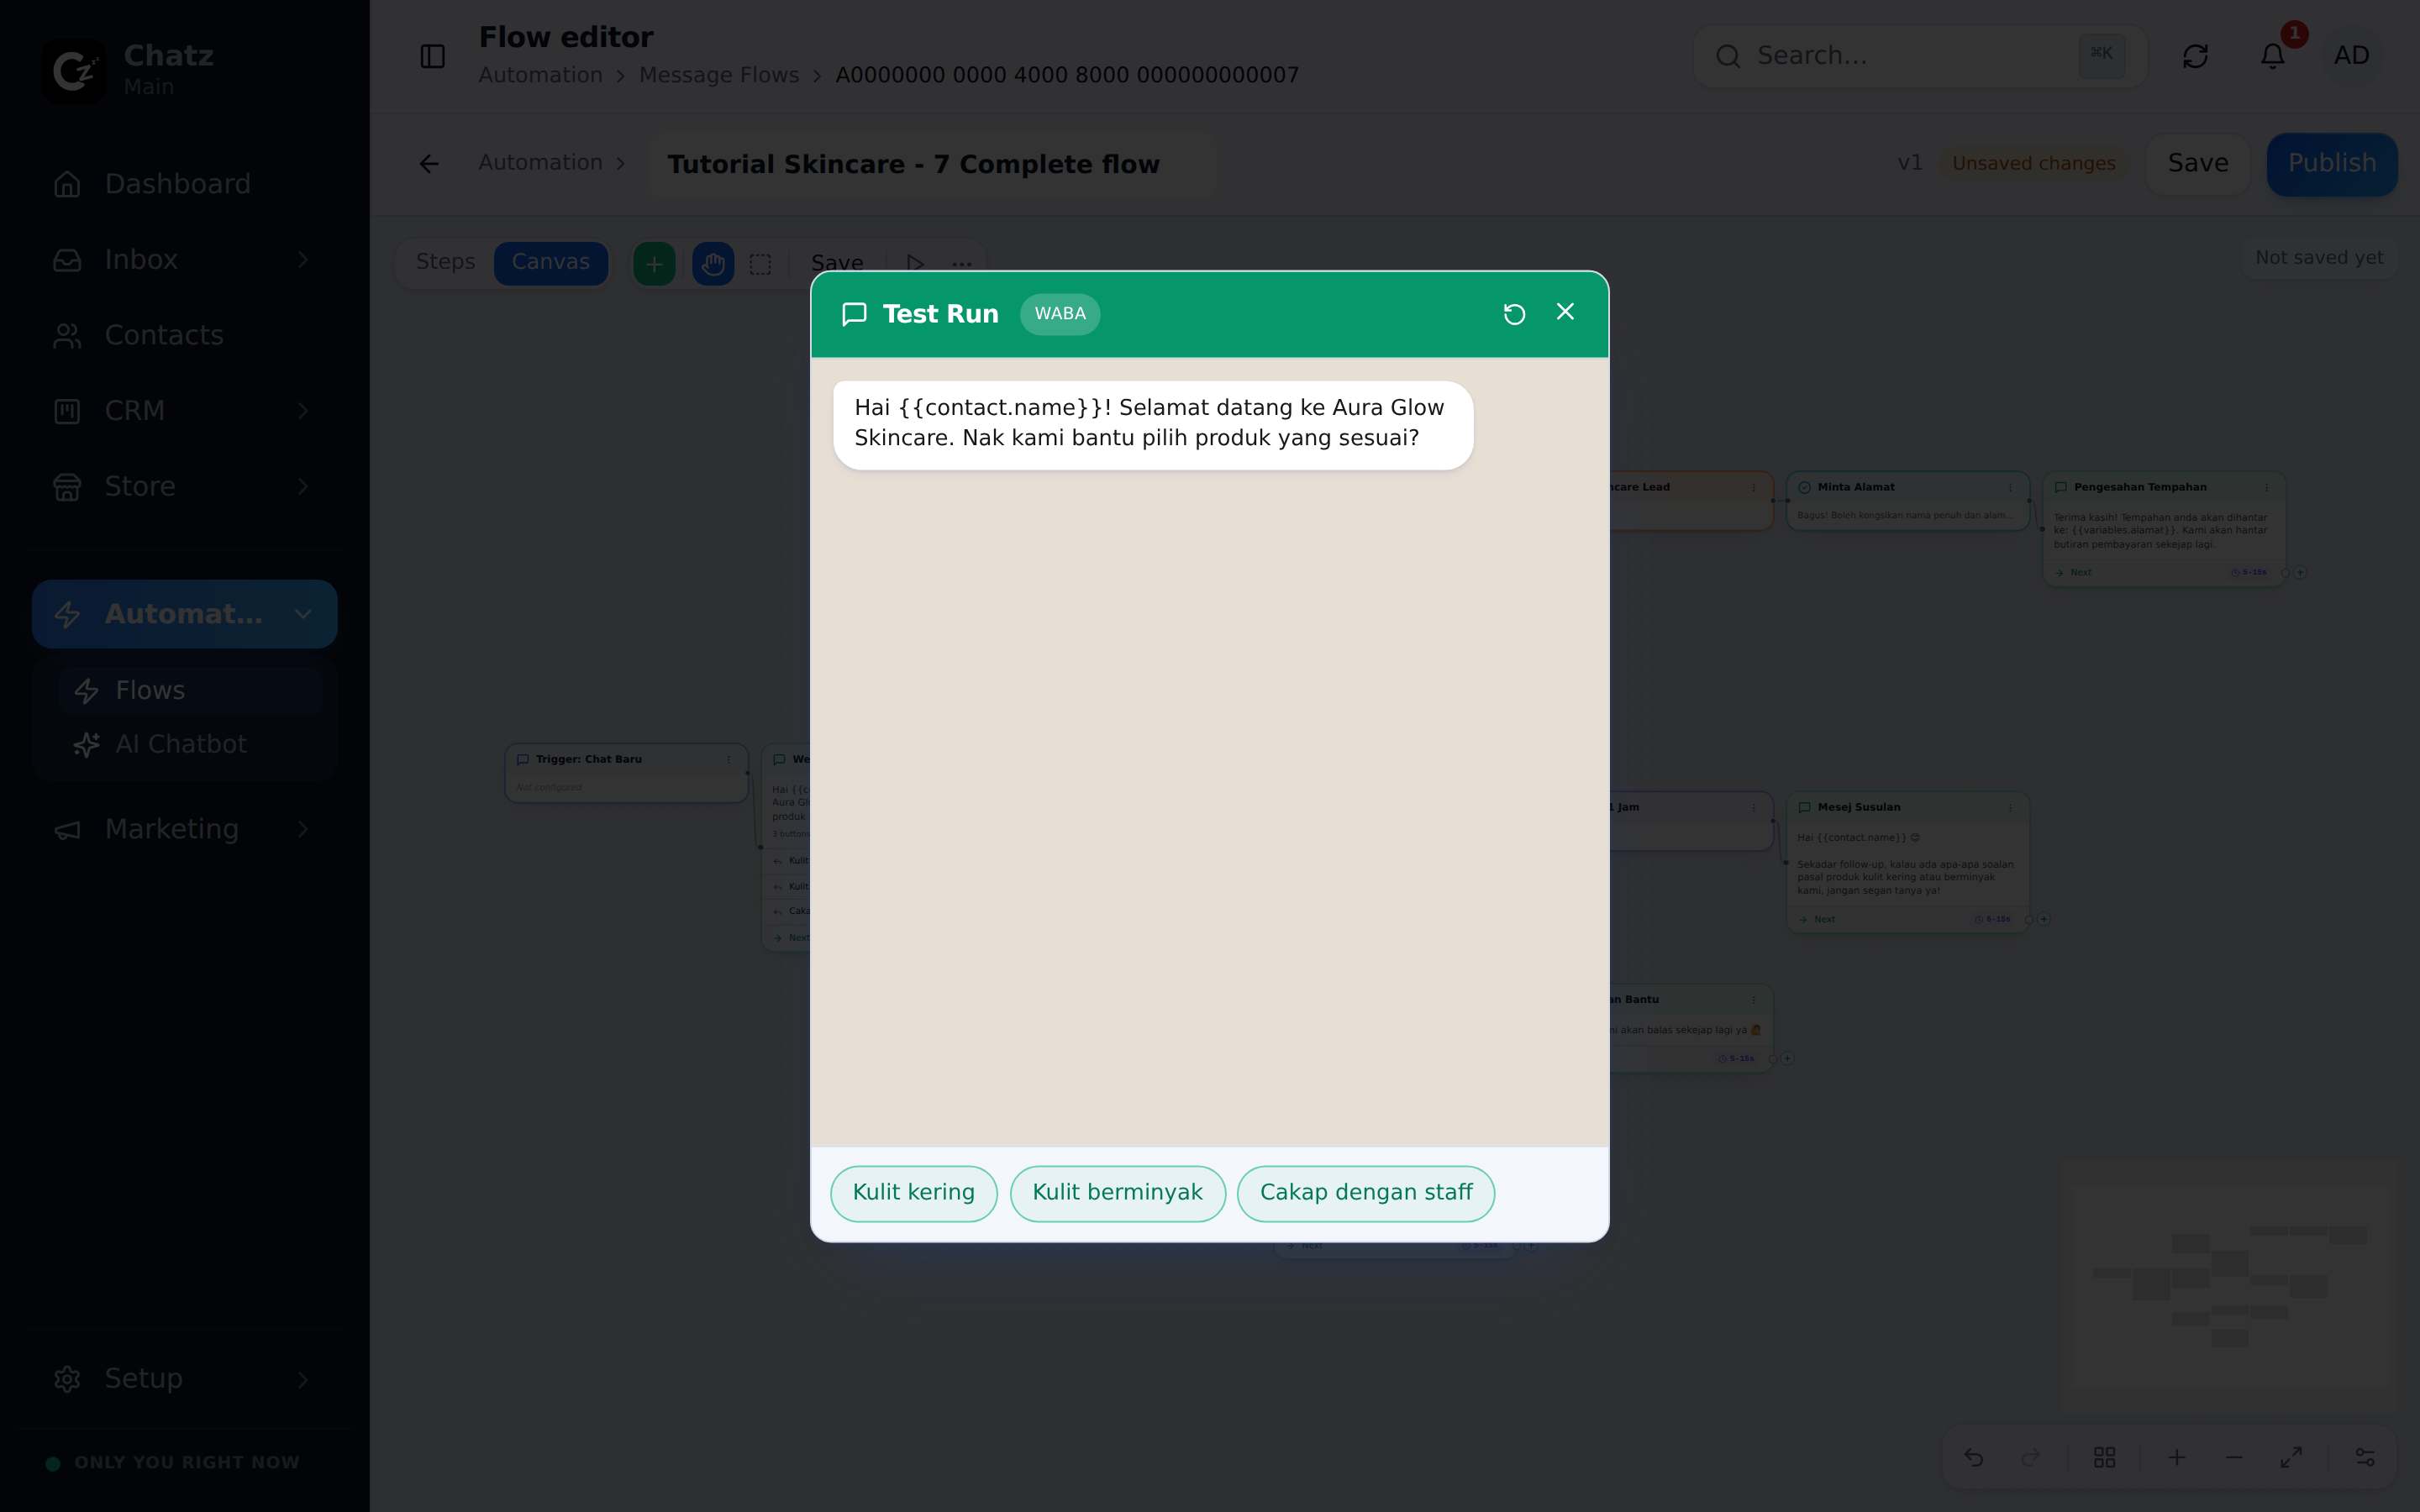
- Flow: "Hai! Selamat datang ke Aura Glow Skincare. Nak kami bantu pilih produk yang sesuai?" with buttons Kulit kering, Kulit berminyak and Cakap dengan staff.
- Customer taps a skin type; the flow recommends the matching set with its price.
- The flow offers to take the order. Tapping YA, buatkan tempahan tags them as a lead and collects the delivery address; tapping Tanya dulu earns a gentle follow-up an hour later.
- Cakap dengan staff assigns a teammate during office hours, and outside them tells the customer when staff will reply.
Step 1: Create the flow
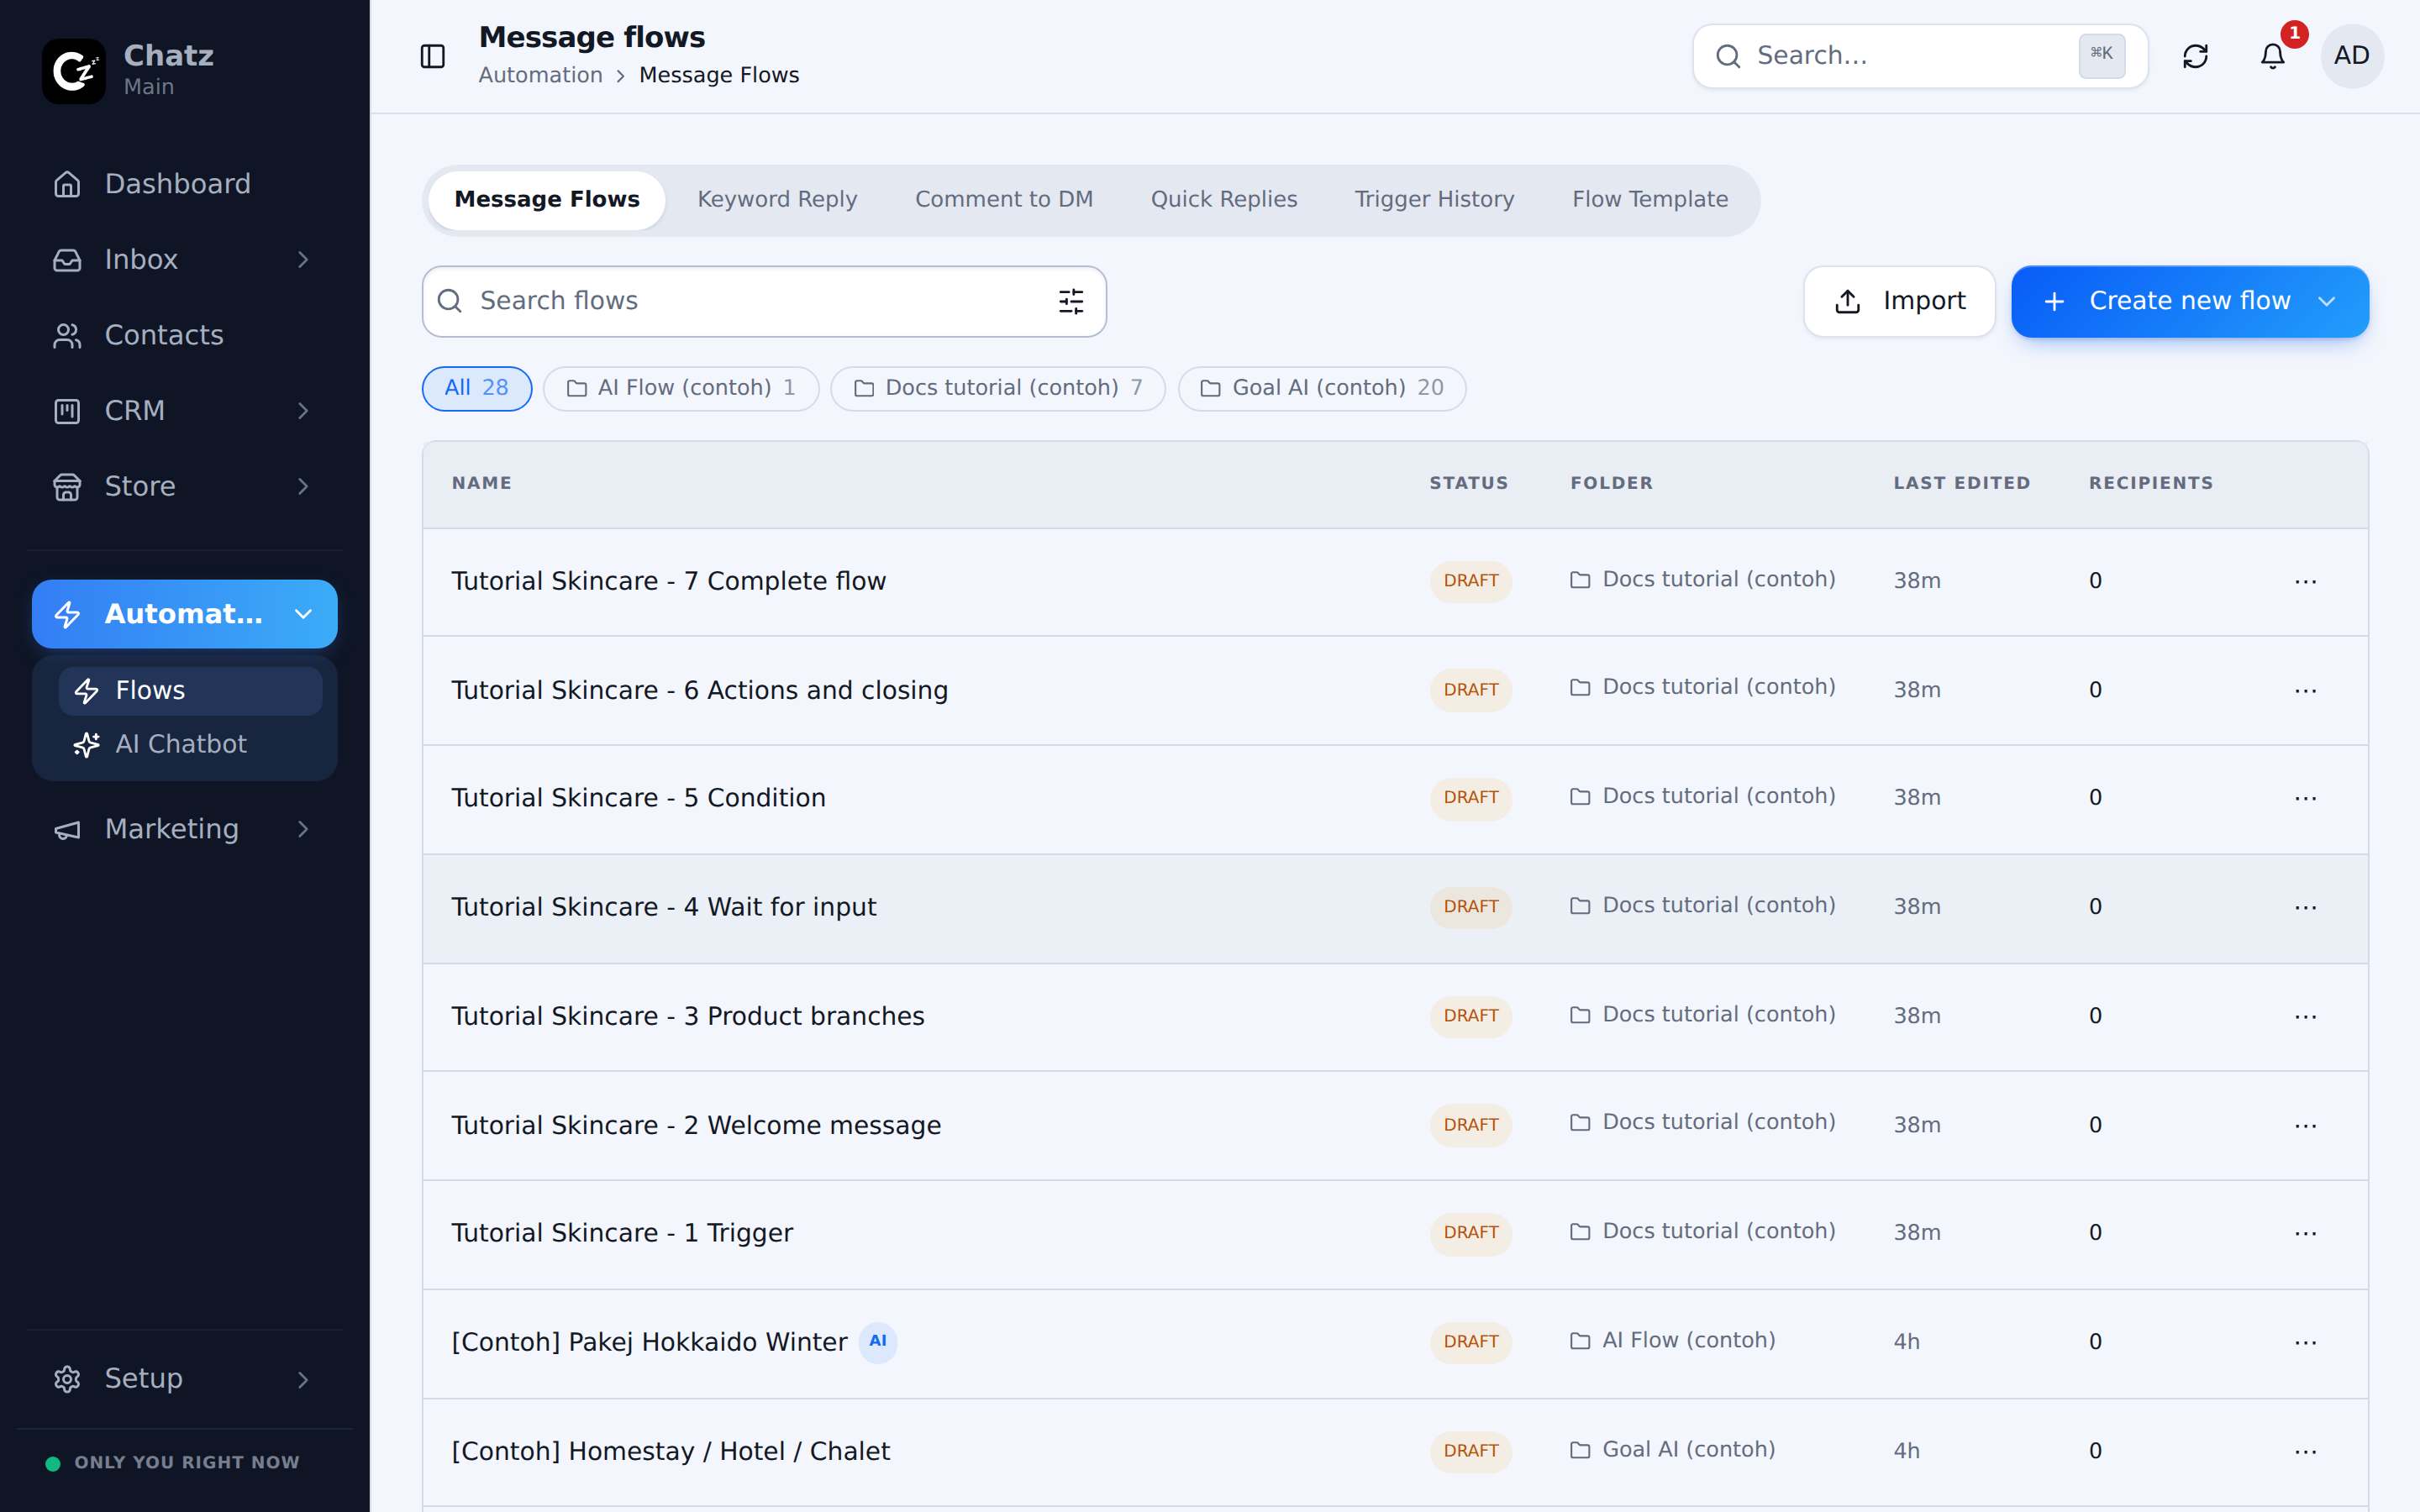
- Open Message FlowsIn the sidebar, go to Automation, then Flows. This lists every flow in your workspace.
- Press Create new flowName it something you will recognise later, for example Skincare welcome and sales. The editor opens on an empty canvas.
Step 2: The trigger
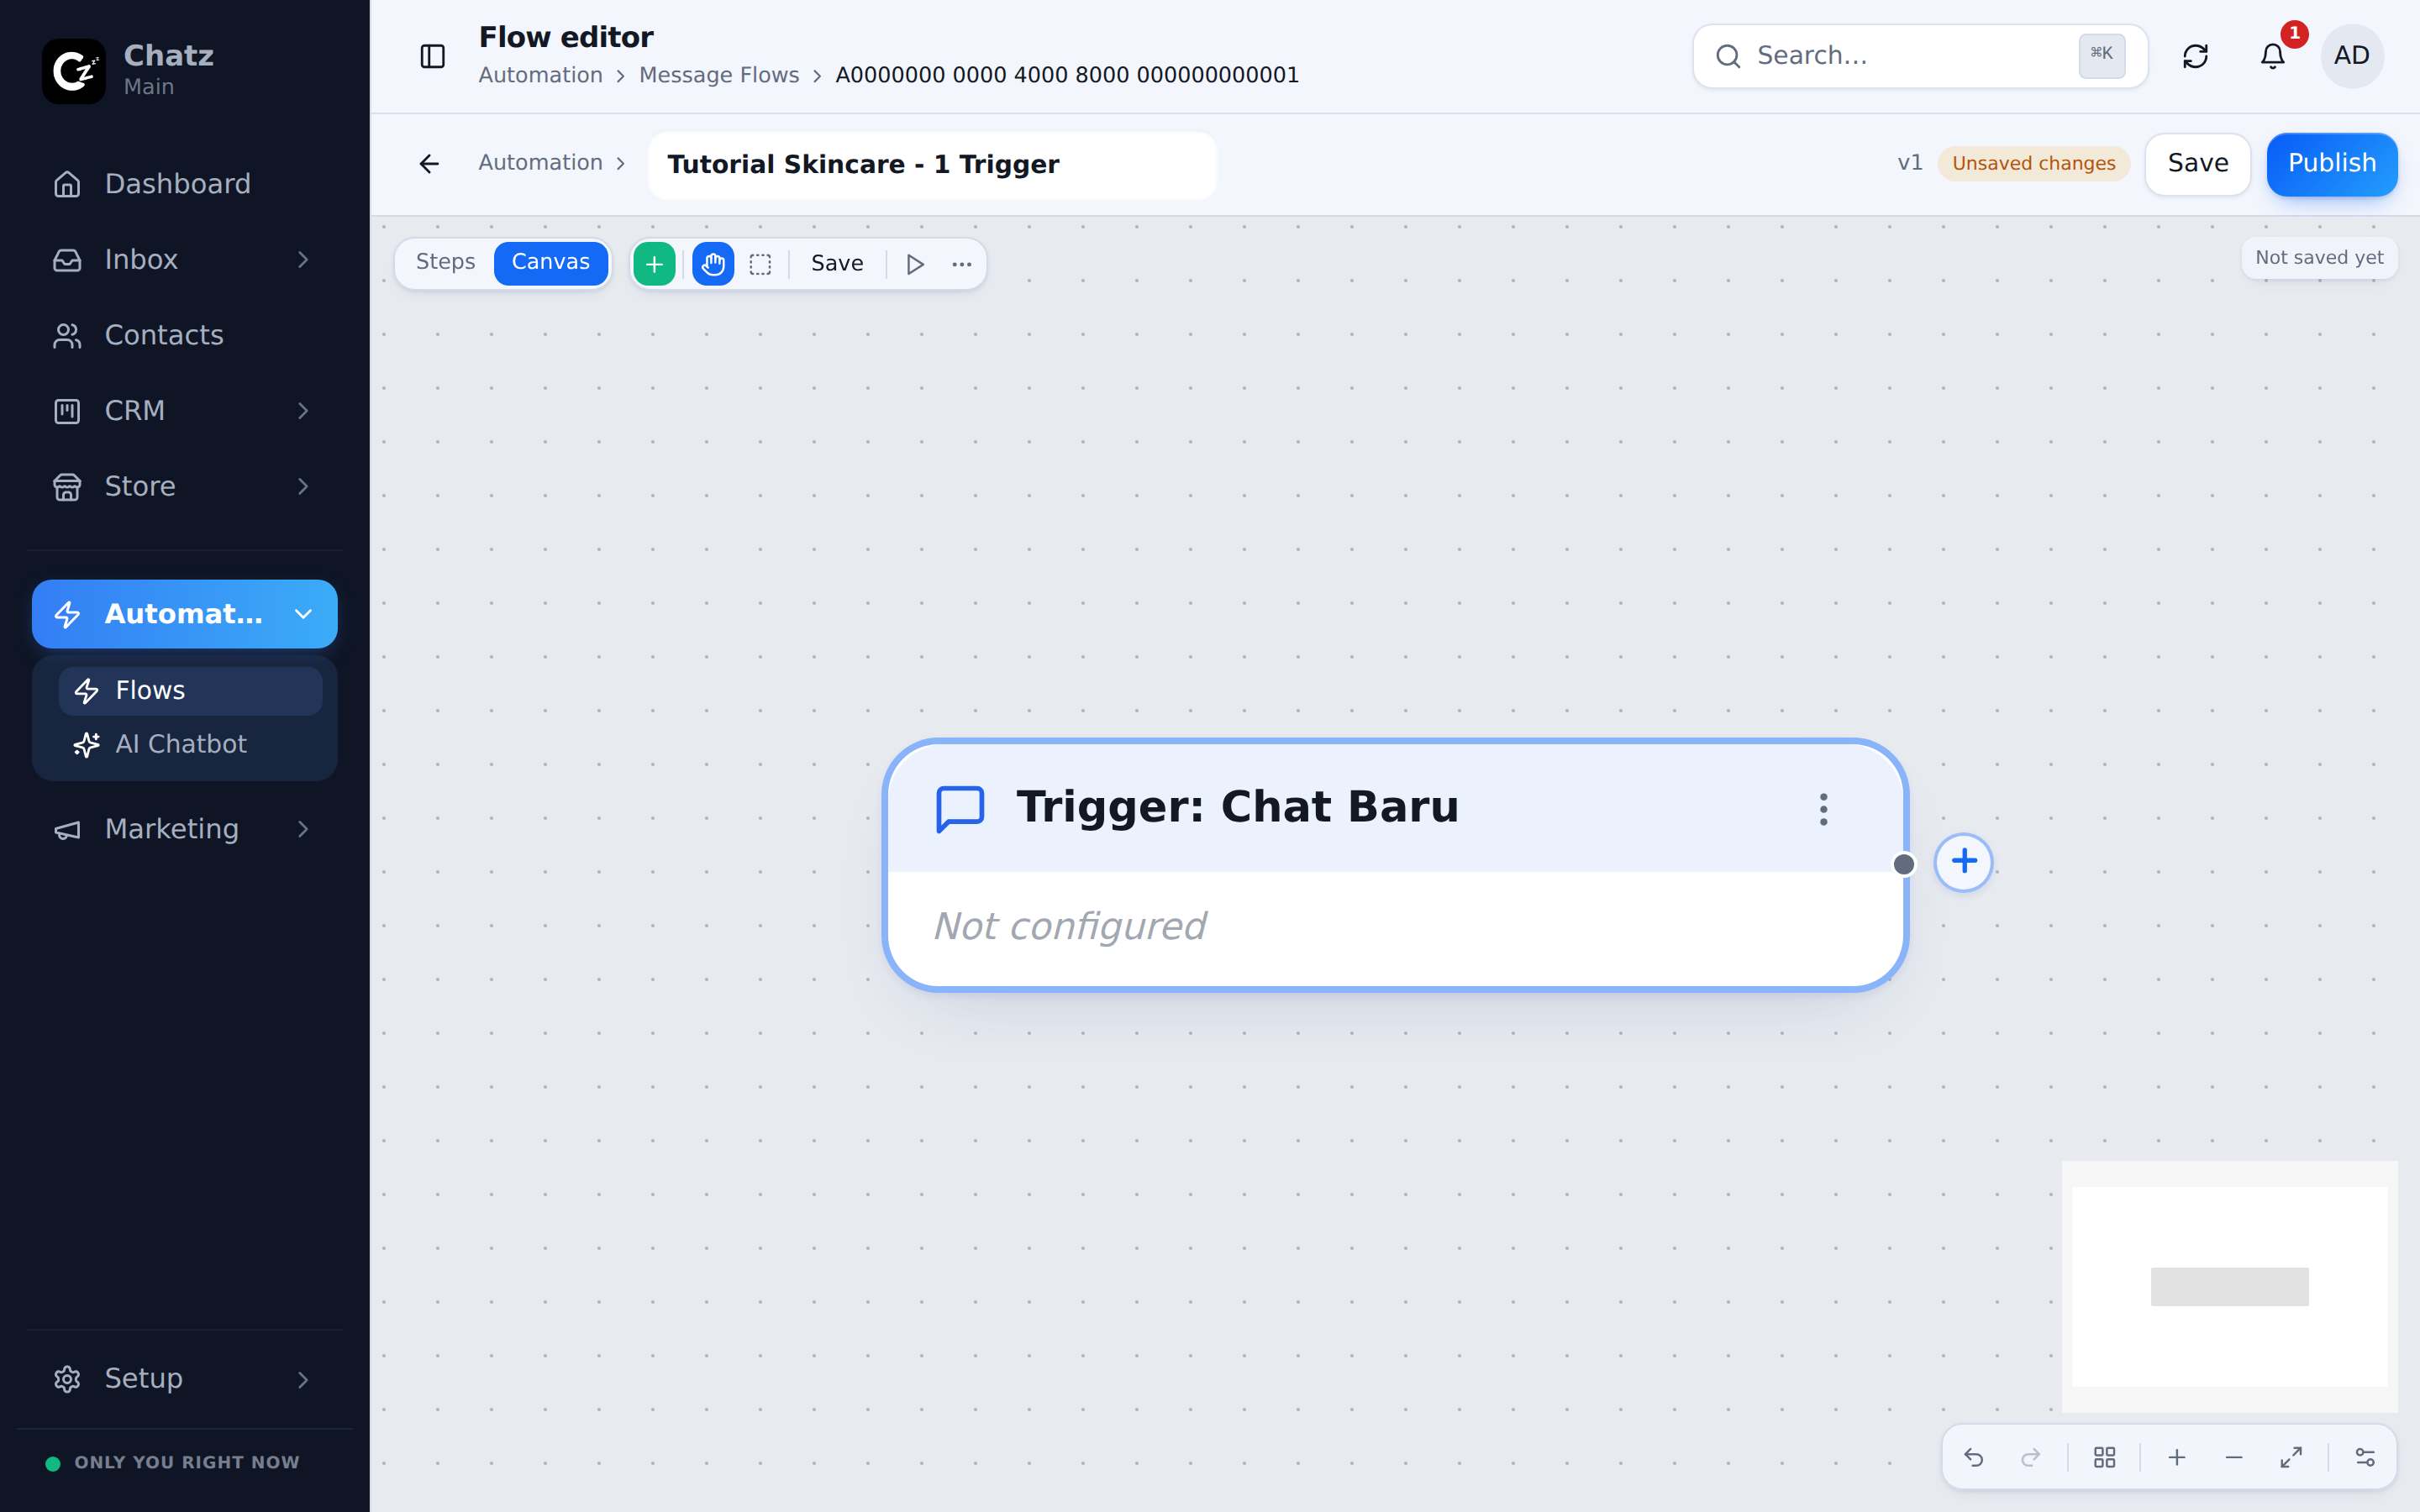
Every flow starts from exactly one trigger. For a welcome flow, pick New chat: it fires the first time a contact messages you on a channel, so every fresh enquiry walks into this flow automatically. It needs no further configuration; left as it is, it fires for every new chat on every channel, and its options only exist to narrow that down.
Step 3: The welcome message with a menu
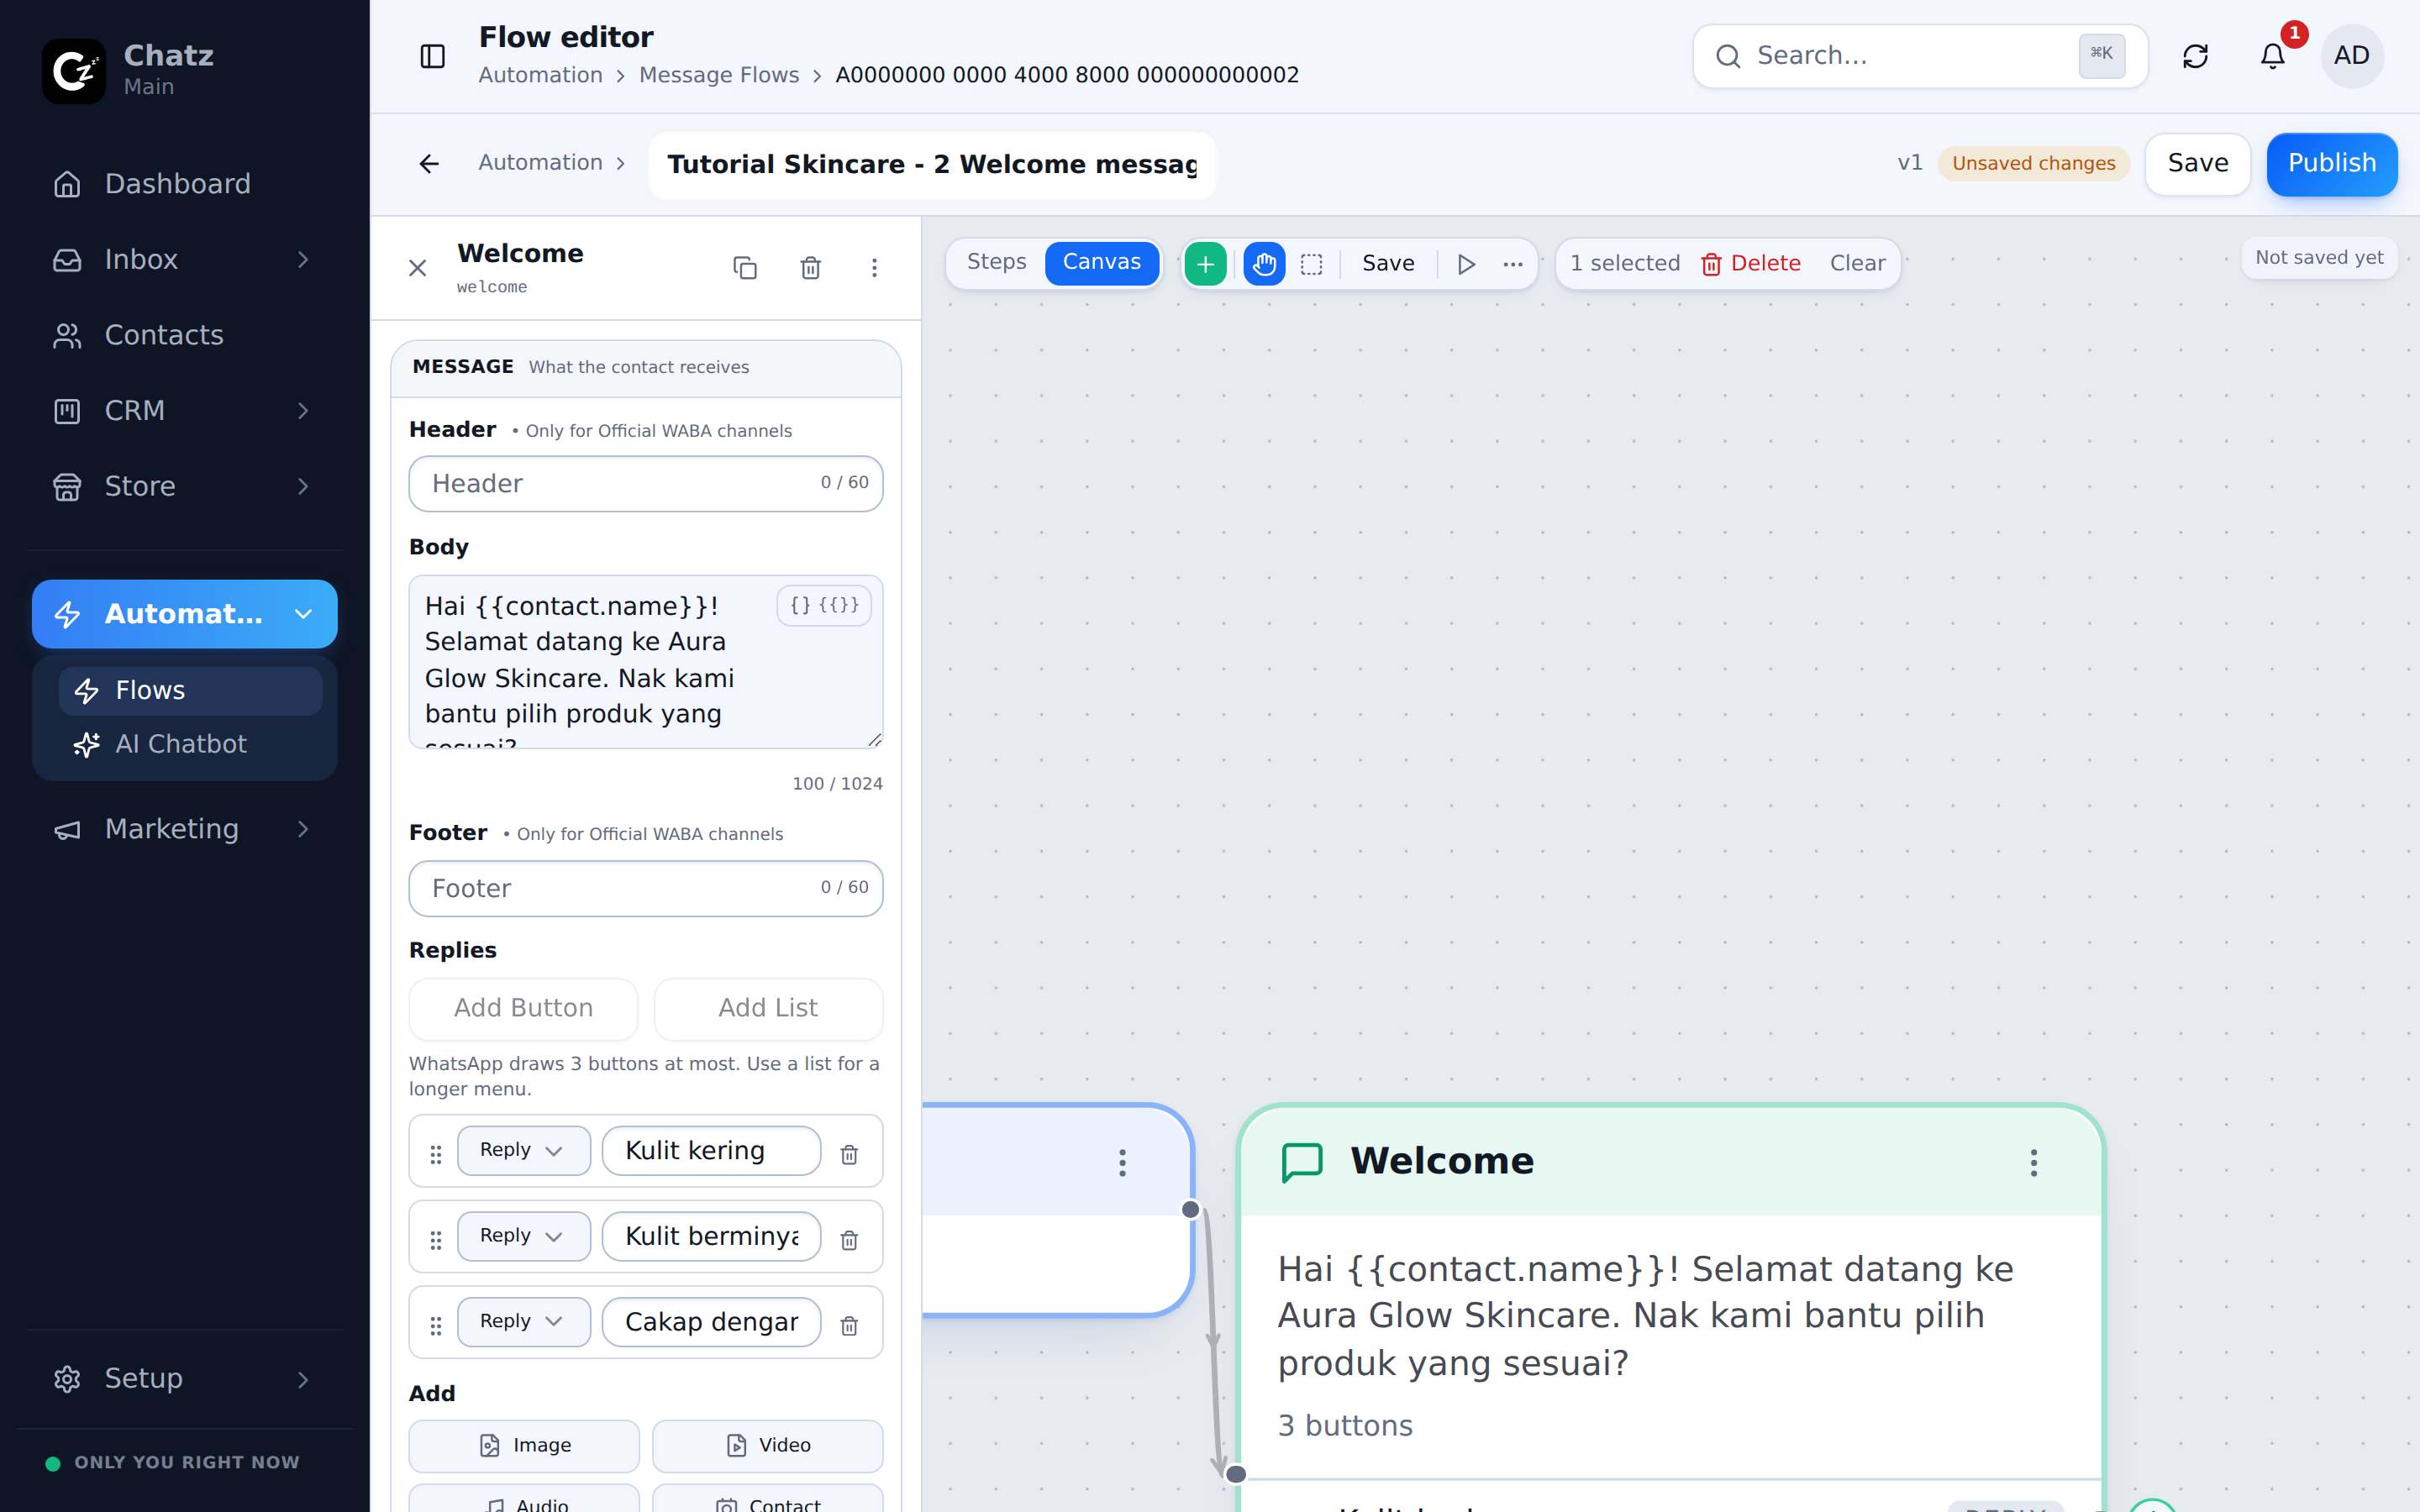
Add a Send message step and connect it to the trigger. Selecting the step opens its config sidebar; this is where all the detail lives:
- Body: the greeting. Use the merge-tag picker to insert {{contact.name}} so each customer is greeted by name: "Hai {{contact.name}}! Selamat datang ke Aura Glow Skincare. Nak kami bantu pilih produk yang sesuai?"
- Buttons: add three reply buttons: Kulit kering, Kulit berminyak, Cakap dengan staff. Each button becomes its own exit on the card, which is what lets the flow branch on the answer. On channels that cannot draw tappable buttons, Chatz sends the same menu as a numbered list automatically, and a typed "1" routes the same as a tap.
Step 4: Product branches
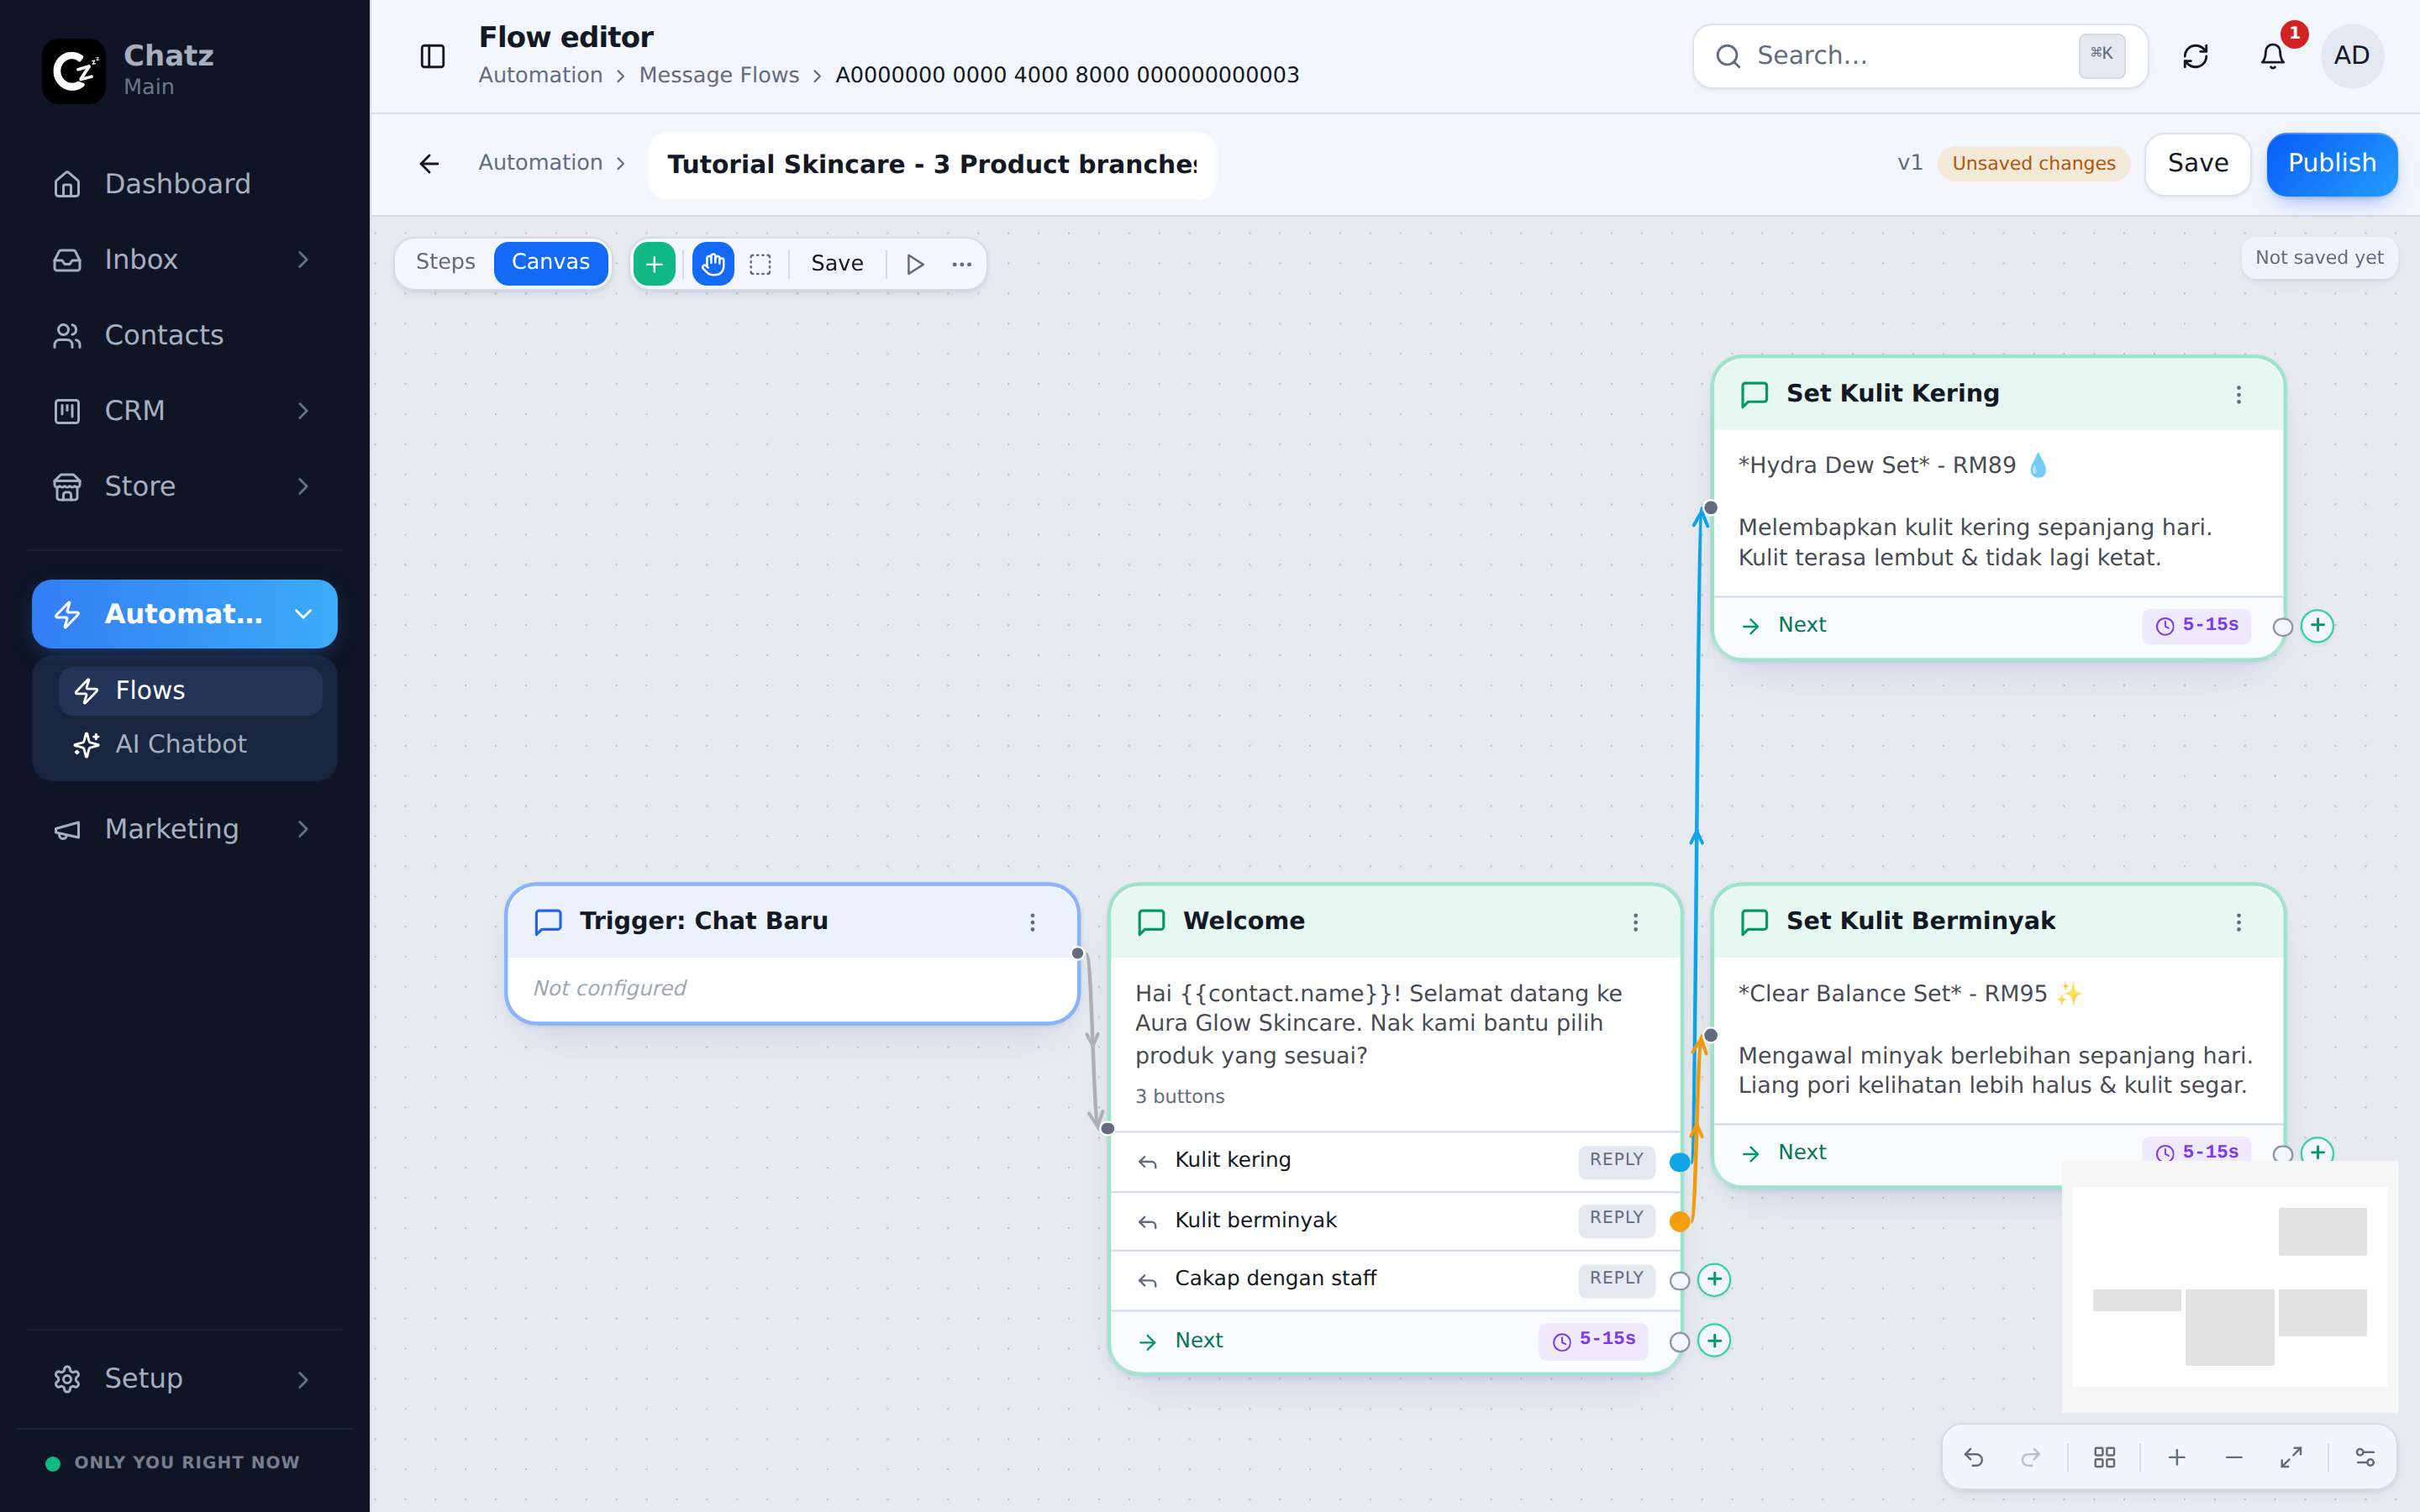
Now give the two skin-type buttons somewhere to go. Add two more Send message steps and draw a line from each button's exit to the matching step:
- Kulit kering leads to the Hydra Dew set recommendation (RM89): what is in the set and what it does for dry skin, in two short lines.
- Kulit berminyak leads to the Clear Balance set (RM95), same shape.
The third button, Cakap dengan staff, stays unconnected for now; it gets a proper ending in step 8.
Step 5: The order question
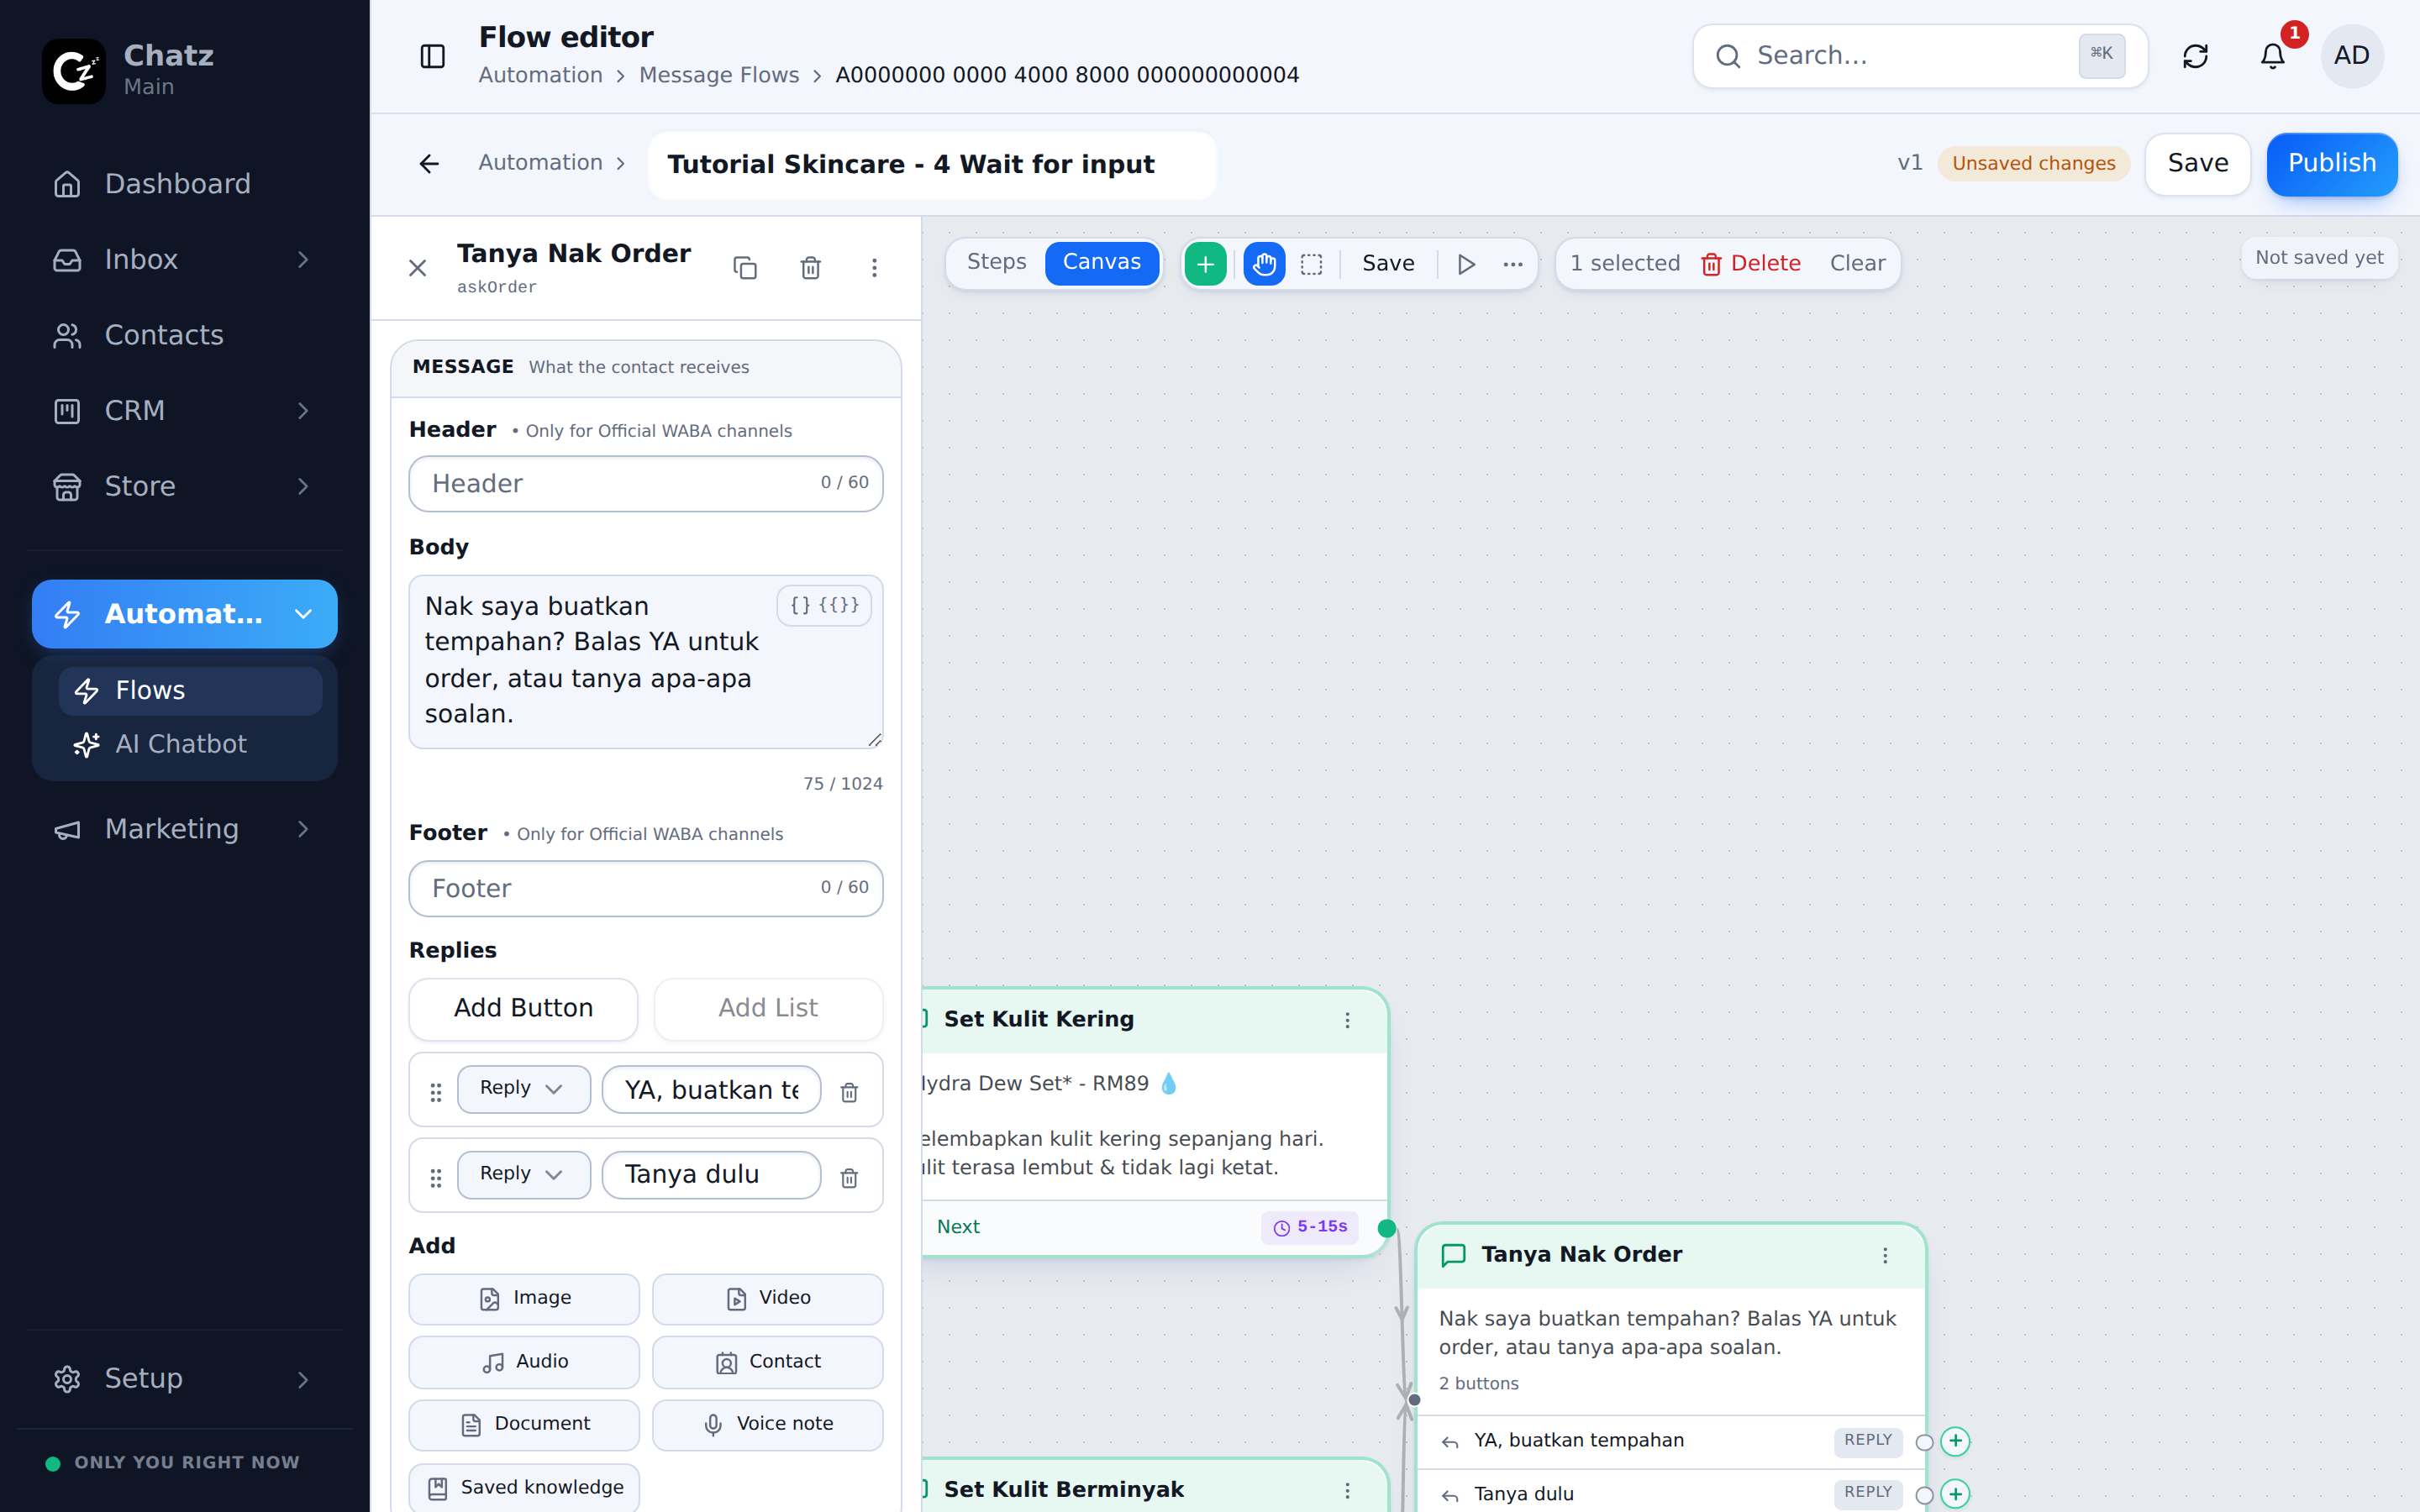
After either recommendation, ask for the order. Add one more Send message step, "Nak saya buatkan tempahan?", with two buttons: YA, buatkan tempahan and Tanya dulu. Connect both product messages into it: two branches can merge back into one step, which saves building the same ending twice. When you want to branch on what a customer chooses, buttons on a message are the way to do it: each button is an exit, and a typed reply that matches a button routes the same as a tap.
Step 6: Tag the lead, take the address
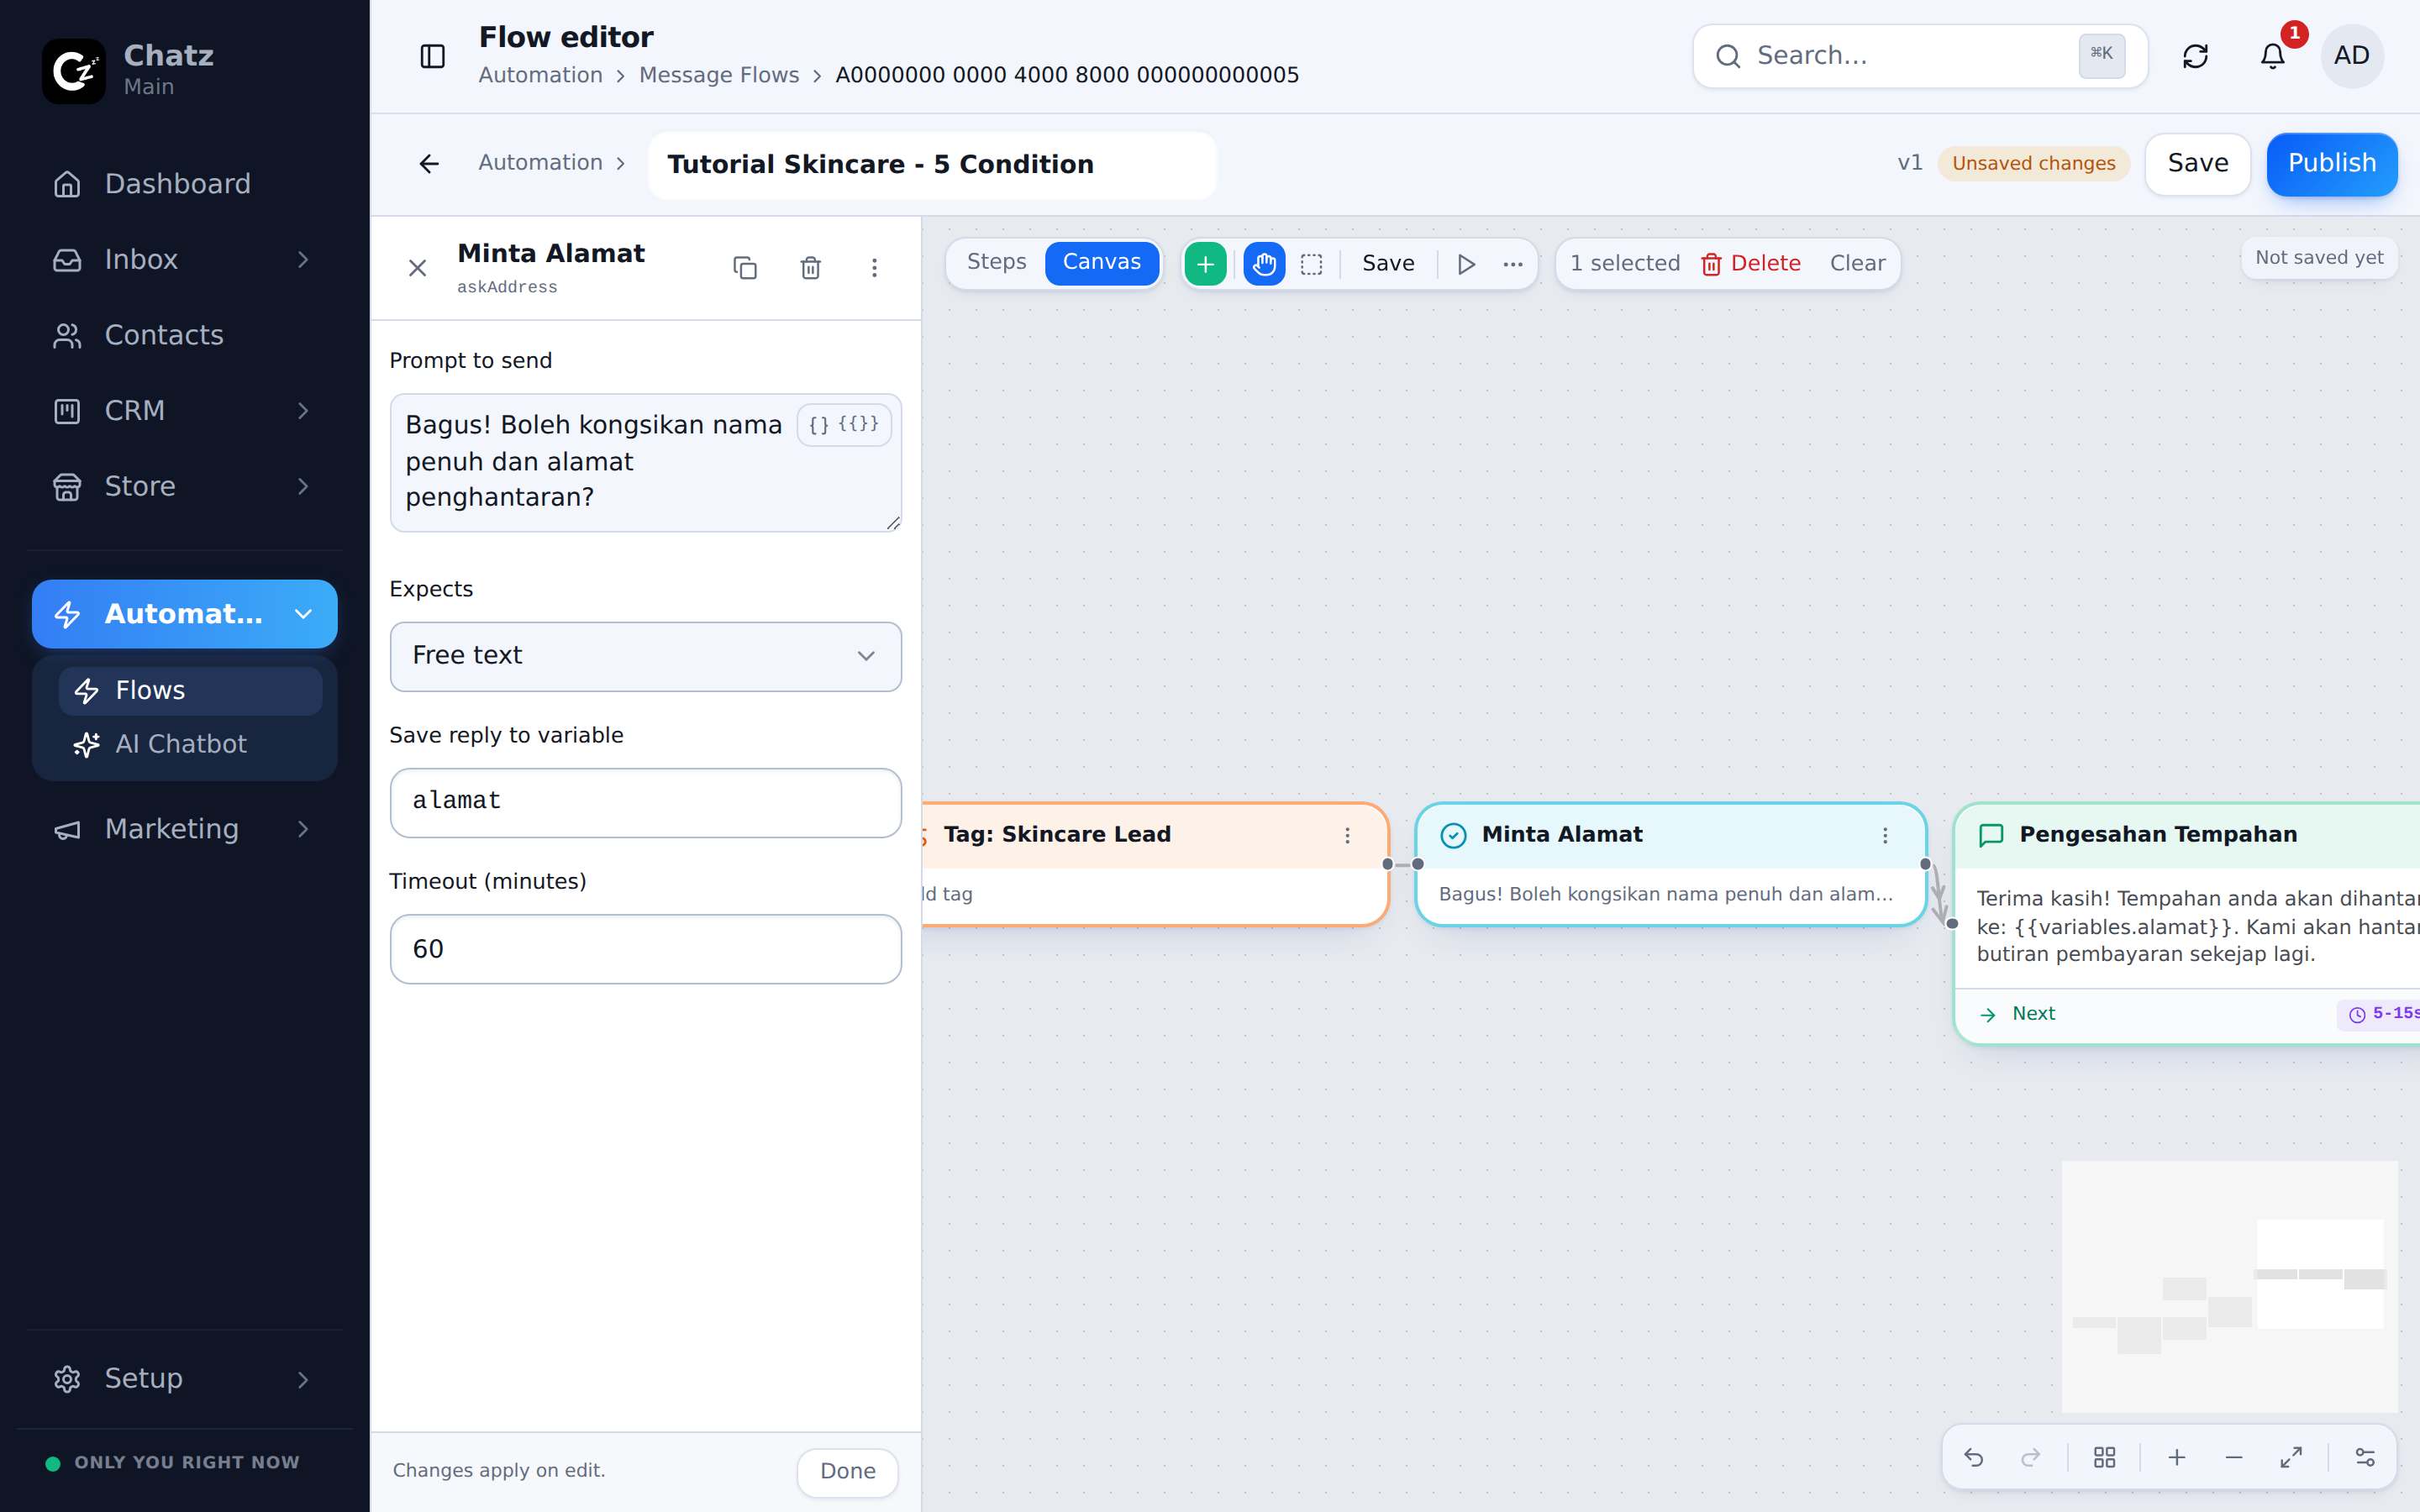
Build the YA, buatkan tempahan branch with three steps in a row:
- Action: add a tag
- Wait for input: the delivery addressAdd a Wait for input step asking "Bagus! Boleh kongsikan nama penuh dan alamat penghantaran?" and save the answer into a variable named alamat. Unlike a button menu, this step accepts free text, and the flow pauses here, per customer, until that customer replies.
- Send message: confirm the orderClose the loop with a message that repeats the captured address back through the variable: "Terima kasih! Tempahan anda akan dihantar ke: {{variables.alamat}}". Repeating it back gives the customer the chance to correct a typo before anything ships.
Step 7: Follow up the hesitant
The Tanya dulu branch is for the customer who is interested but not ready. Add a Delay step set to 1 hour, then a Send message with a gentle nudge: "Sekadar follow-up, kalau ada apa-apa soalan pasal produk, jangan segan tanya ya!". While the delay is waiting, the customer's thread shows a scheduled bubble for the coming follow-up, so any agent who has taken over the conversation by hand can see it coming and cancel it.
Step 8: Office hours for the staff branch
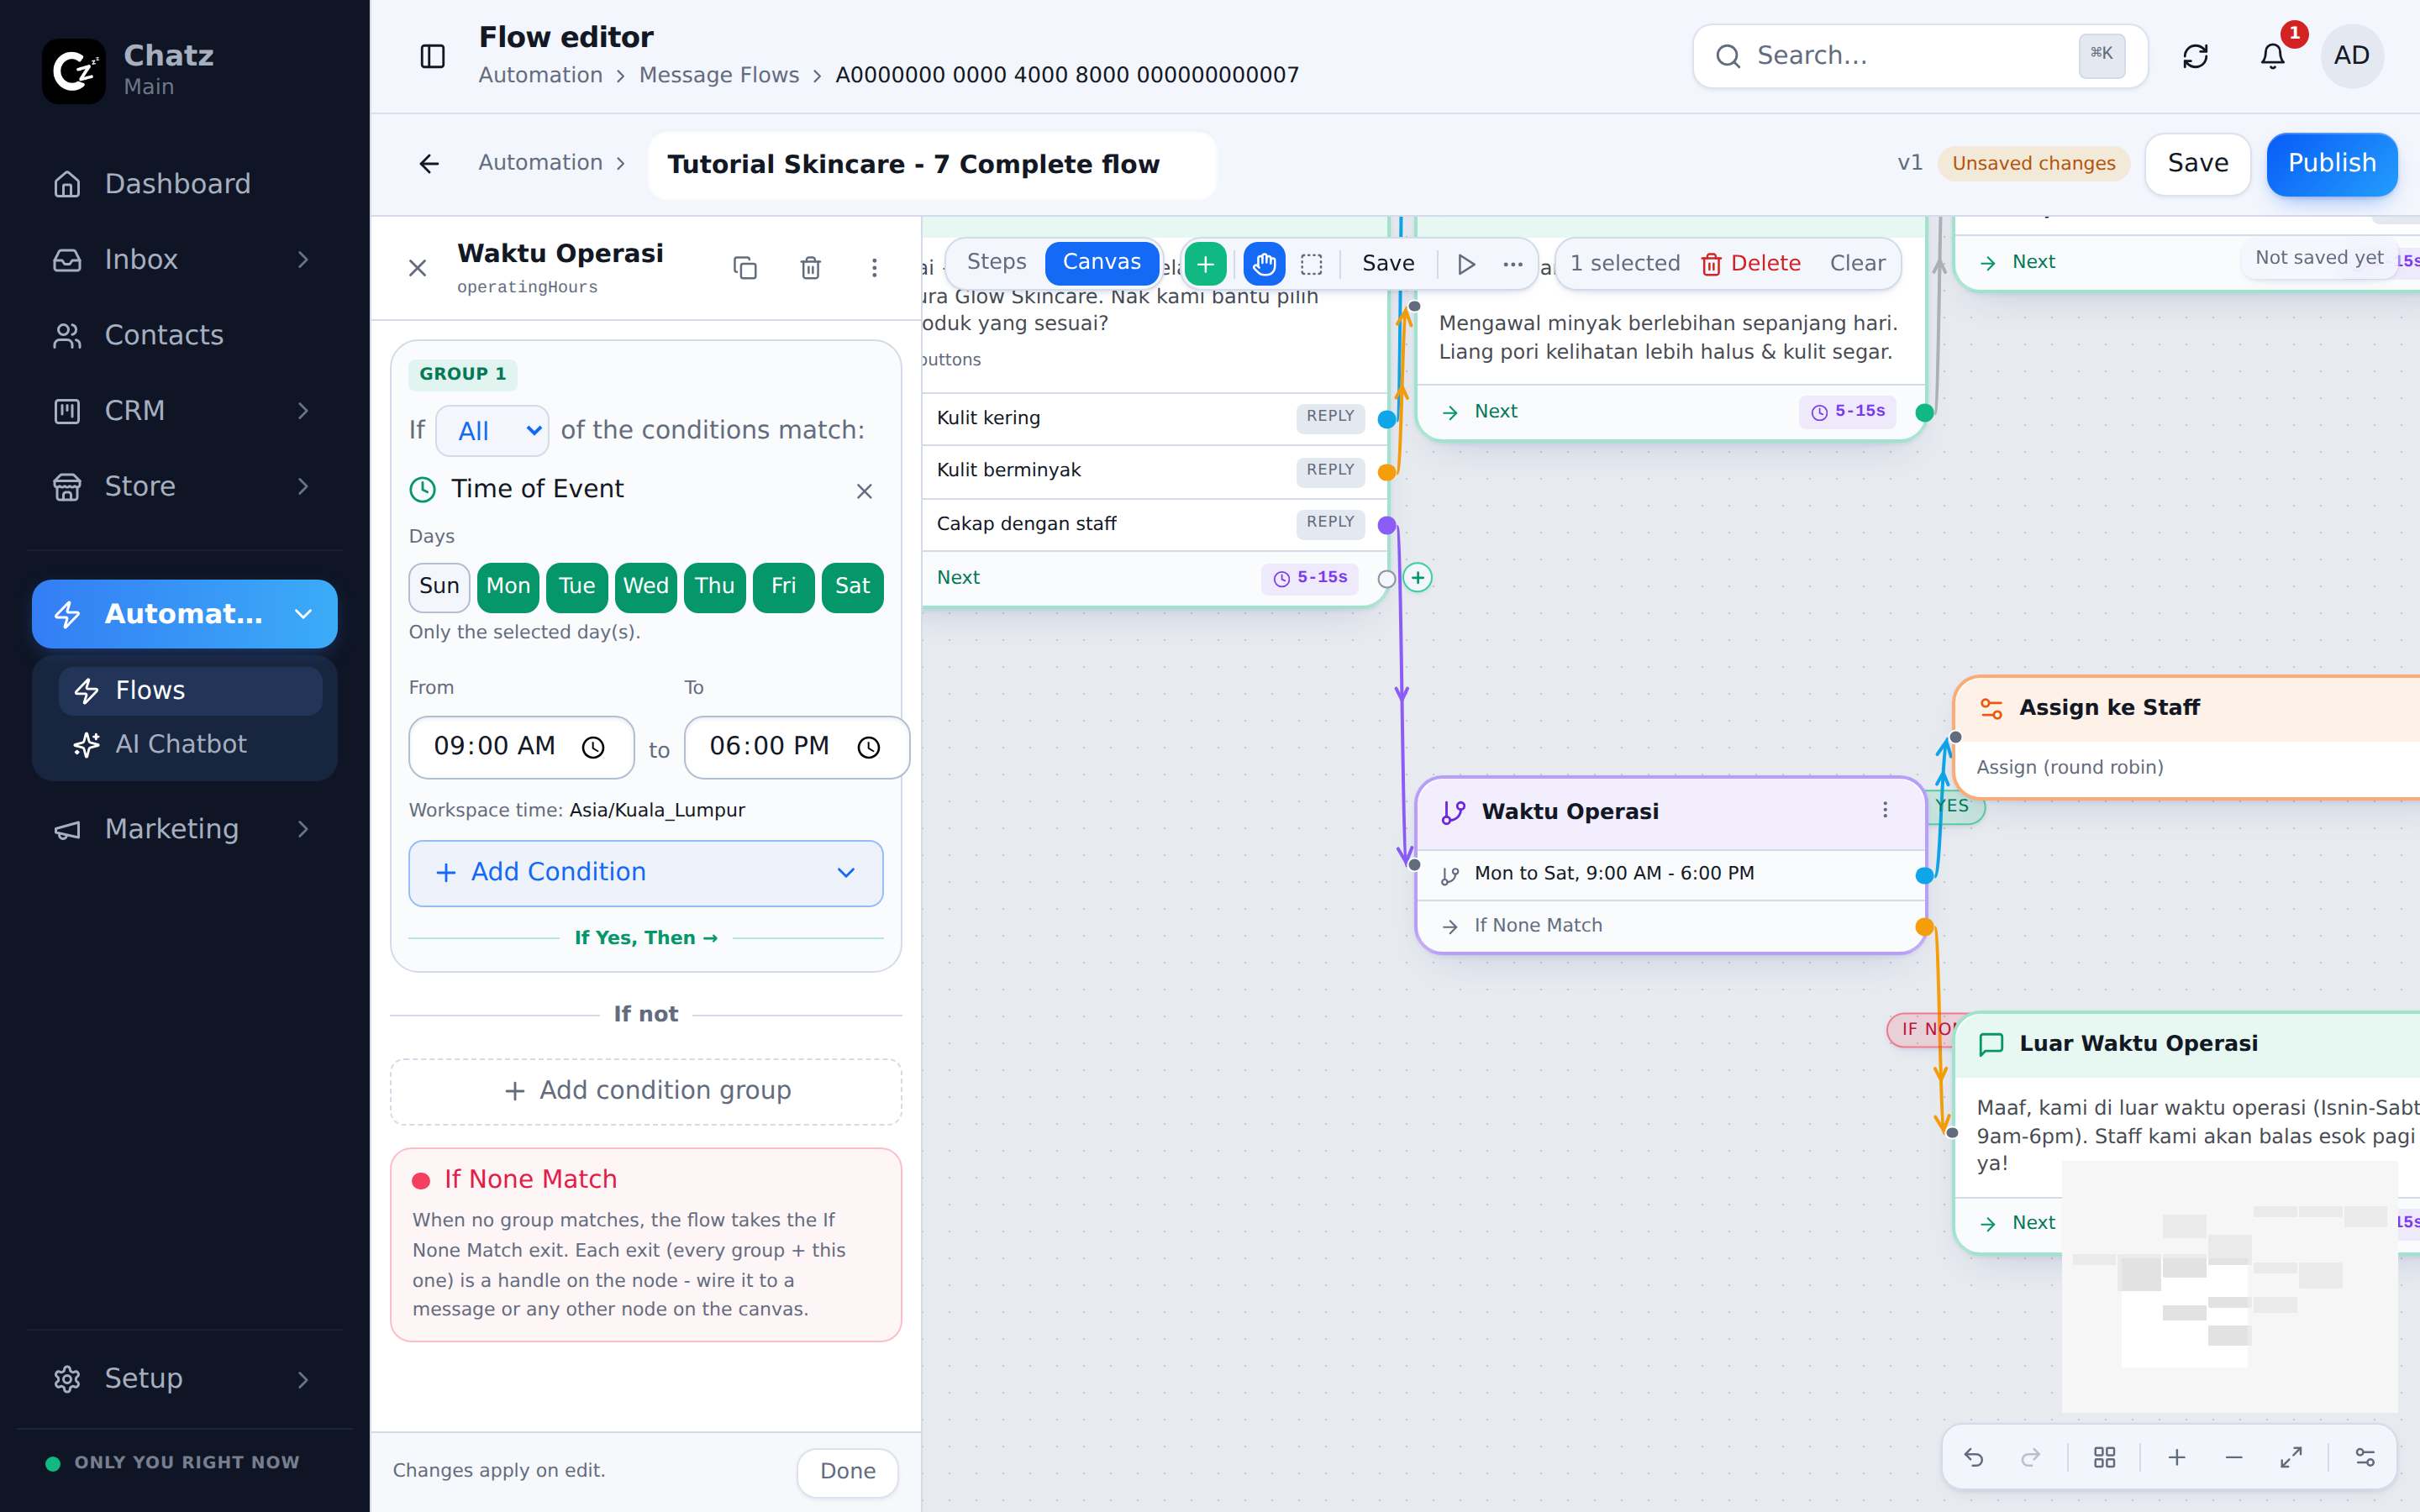
Finally, the Cakap dengan staff button. Handing a customer to a human at 2am promises a reply nobody is awake to give, so put a Condition step in the way. A condition checks facts about the contact or the moment (their tags, their channel, the time of the event) and takes the first rule that matches; if none match, it takes the If None Match exit. Here, one rule with a Time of Event clause, Monday to Saturday 9:00 to 18:00, splits the branch:
- Within hours: an Action step assigns the conversation round robin, so incoming staff requests are shared fairly across the team, then a short message tells the customer someone will reply shortly.
- If None Match (outside hours): a message sets an honest expectation: "Maaf, kami di luar waktu operasi (Isnin-Sabtu 9am-6pm). Staff kami akan balas esok pagi ya!"
Step 9: Test and publish
- Run the Test Run simulatorPress the play button in the editor toolbar. The simulator walks the flow in a fake conversation: tap the buttons, type replies, and check every branch reads the way you want, without messaging any real customer.
- Fix, then publishAnything that reads wrong is one click away in the config sidebar. When every branch behaves, press Publish. New chats now walk into the flow on their own.
- Watch it workTrigger history lists every run as it happens, and the flow's stats page shows completion rate and where people drop off.
| Step type | Where this tutorial used it |
|---|---|
| Send message | The welcome menu, both product sets, the order question, the confirmations and the follow-up. |
| Action | Adding the Skincare Lead tag, and assigning the conversation round robin. |
| Wait for input | Capturing the delivery address into the alamat variable. |
| Delay | The 1 hour pause before the follow-up nudge. |
| Condition | Office hours on the staff branch, with If None Match for after hours. |